
We may earn a commission when you buy through links on this page. It never changes what we recommend. How we pick
On this page7 parts
- Fit the Pod to the Brewer Before You Fill It
- Fill to the Line, Level, and Close Until It Clicks
- What the Fill Line Weighs, in Grams
- Read the Cup: Thin, Gritty, or Spilling
- Month Two: Rinse, Check the Mesh, and Know When It Is Not the Pod
- Fill to the Line, Taste, Then Change One Thing
- Frequently Asked Questions
The first mug from a reusable pod comes out pale, or the second has grit at the bottom, or there is coffee across the counter, and the bag of pre-ground coffee you already own is rarely the culprit. How to use reusable coffee pods in Keurig comes down to something a sealed pod never asks of you: a sealed K-Cup has its dose weighed at the factory, so for a sealed pod it is true, as the Keurig lines and Strong button guide says, that the pod fixes the dose. A reusable fixes nothing. The line you fill is the dose, and the size button only decides how much water meets it.
The order runs like this: check the pod fits, fill to the line, see what that line weighs in grams, read what the cup is telling you, and then look at what changes by month two.
Quick Answer
The fill line on the pod, not the scoop, sets the dose, so the steps run in this order.
- Match the pod to your brewer’s series; on a MultiStream brewer, pull the red lid plug.
- Use a medium grind, the drip setting, never espresso-fine.
- Fill to the cup line under 10 ounces, the mug line above, never past MAX.
- Level the grounds with a tap on the side; do not press them down.
- Close the lid until it clicks, then set the size on the button, not with extra coffee.
Fit the Pod to the Brewer Before You Fill It
A fill line only means something on a pod that fits, so settle that before any coffee goes in. A pod can close, click and still brew thin because the dose was never set, which makes fit and fill two separate checks.
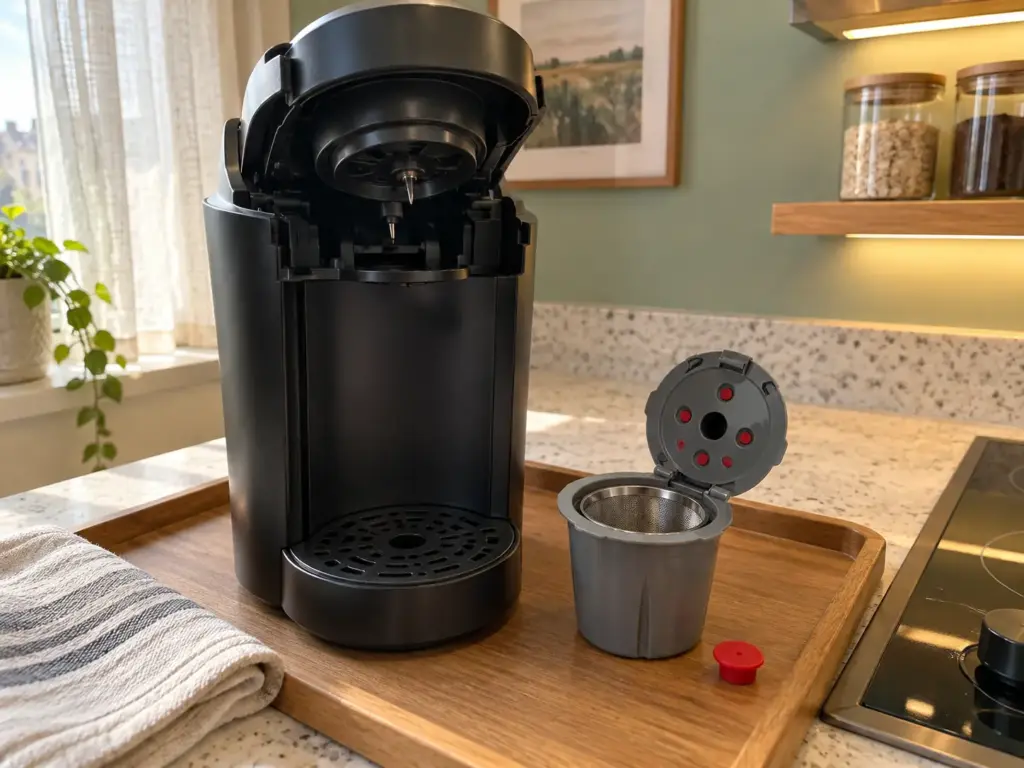
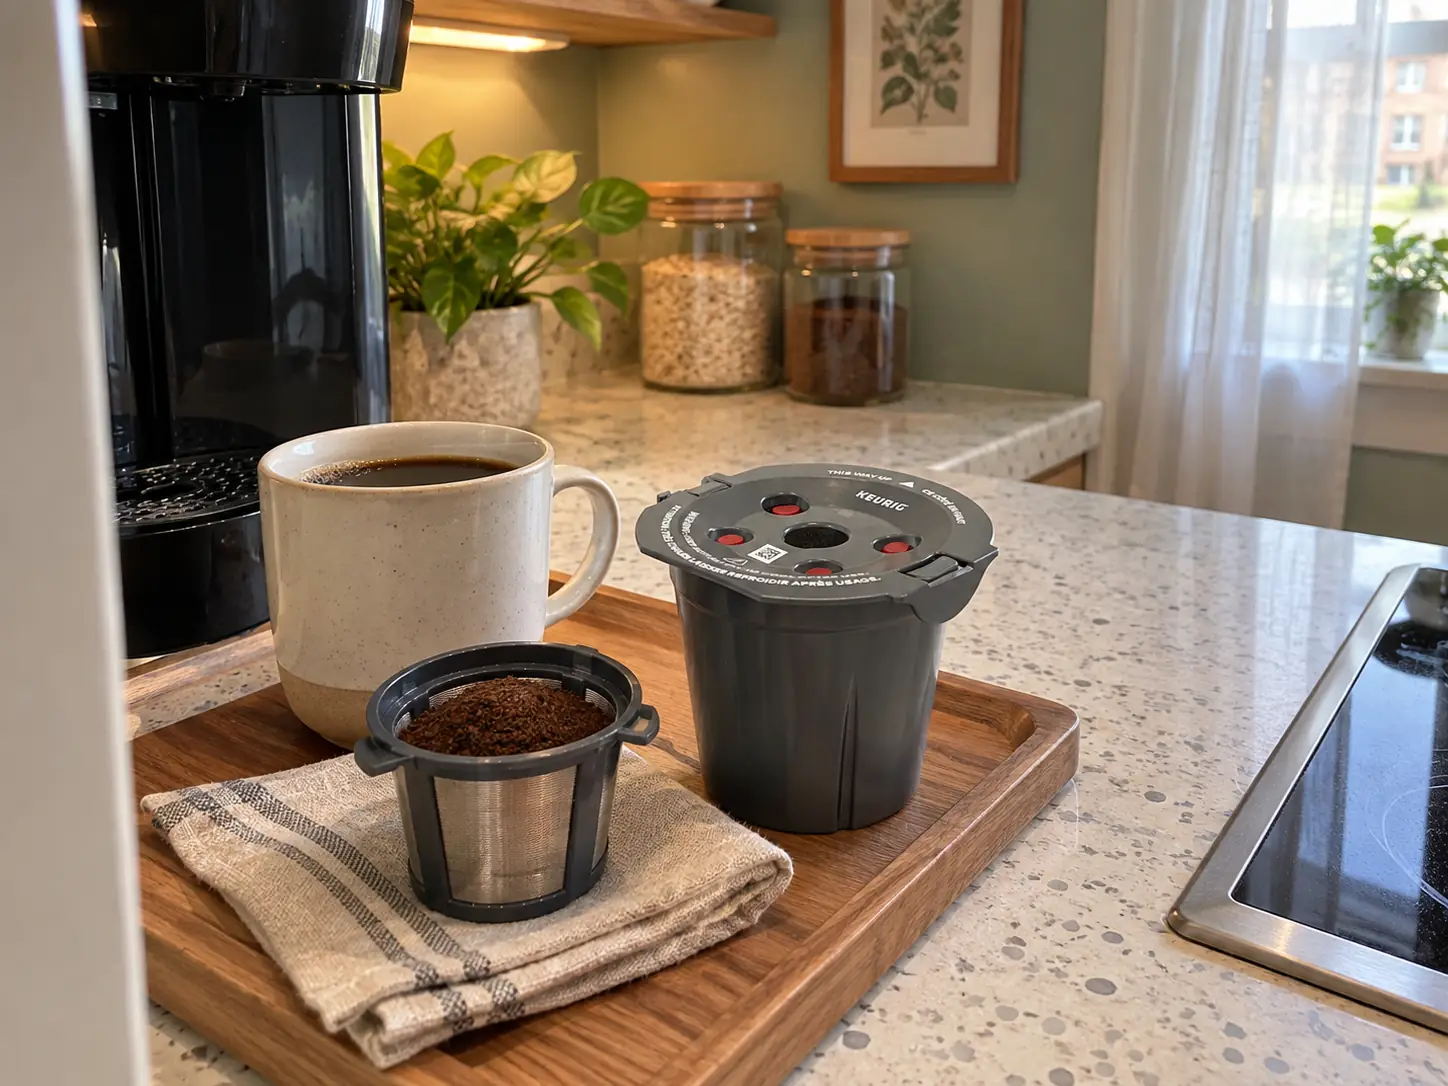
Keurig’s own support page for the My K-Cup lists the current Keurig My K-Cup Reusable Coffee Filter as working with the K-Express, K-Duo, K-Slim, K-Mini and K-Supreme families and the 1.0 brewers, and not with the 2.0 brewers (the K-200, 300, 400 and 500 series) or the K-Crema. A pod that does not fit is not a fill problem, so that mismatch is a hard stop. The pod also has a flaw the next section is built around: it overflows when it is filled past the MAX line. Its three marked lines (cup, mug and MAX) are the ones every step below reads.
On a MultiStream brewer the same page says to remove the red lid plug. That is the one needle-related step here, and it applies to MultiStream brewers; which pod suits a single-needle brewer or a MultiStream one is a bigger question, and which reusable pod suits your Keurig’s needle answers it.
Do not assume the plug is the whole story, though. A K-Supreme can still give watery, split streams where a sealed pod gives one even flow, and the usual answers point straight at the fill and the grind. Those come next.
The paper filter, if you use one, goes inside the basket that comes with the pod, never in place of it. Month two (the last section) comes back to that.
Fill to the Line, Level, and Close Until It Clicks
A drip machine trains the habit of scooping by eye, a heap for the big mug and a flat one for the small. A reusable pod works the other way round, because the line on the plastic replaces the scoop, and the scoop is just a way of reaching it. This is also where the one-change rule starts: the first change is the line, and everything else waits for the next cup.
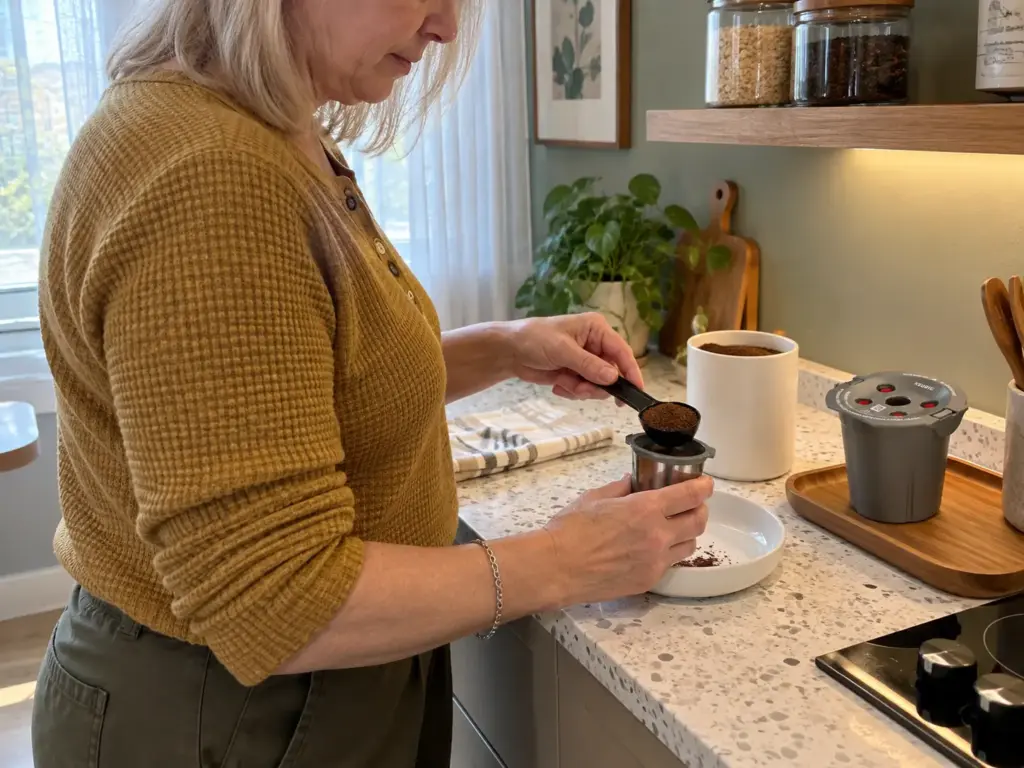
Grind: medium, not espresso-fine
Keurig’s page says to “Use a medium grind for optimal brewing results” and warns that very fine grounds can clog the filter. A fine grind feels like it should make a stronger cup. In a mesh basket it does the opposite: the water finds the few paths that still pass and skips the rest.
Too coarse is the other side, because the water runs through before it has finished extracting, and the cup tastes like weak coffee with a sour edge. If your coffee is already ground, a bag labeled for drip is enough, and the K-cup grind guide has the full chart so this page does not have to.
Fill only to the MAX line
According to Keurig’s own support page, “Fill the filter only to the MAX fill line to prevent overflow.” The page also gives a way to read the other two marks: the lower cup line suits drinks under 10 ounces, the upper mug line suits drinks above 10, and filling below either one is allowed for the strength you prefer. So pick the line by the size you will press, not by how full the pod looks.
The same failure shows up from the other side: a pod filled past its line overflows and makes a mess. If the pod is hard to close, that is the first thing to look at.
Scoop to the line, then tap the side of the pod once to settle the grounds. The tap closes the gaps a scoop leaves without compacting anything, which is exactly what pressing down with a spoon does.
Level it, do not pack it, and listen for the click
Keurig’s page says compressing the grounds or filling above the top line can hurt the brewer’s performance and the taste of the cup. The answer to a pod that brews weak is the same instinct in plainer words: leave it a little loose rather than packing it chock full. Packing feels like adding coffee. It is closer to adding resistance, and the water takes whichever side of the basket gives.
Then close the lid. Keurig says you will feel a click when it is properly closed, so a missing click is a real fault, and a brew without the seal is the one that sprays. A few grounds on the rim can stop the lid seating just as an overfilled pod does, so wipe the rim with a finger before you close it. That is the same fault as overfilling, seen from another angle, and the symptoms section below reads it that way.
What the Fill Line Weighs, in Grams
A line tells you how high, not how much, and the same line gives a different cup at 8 ounces and at 10. So this is where the line gets its grams, with the division shown so you can rerun it for your own brewer.
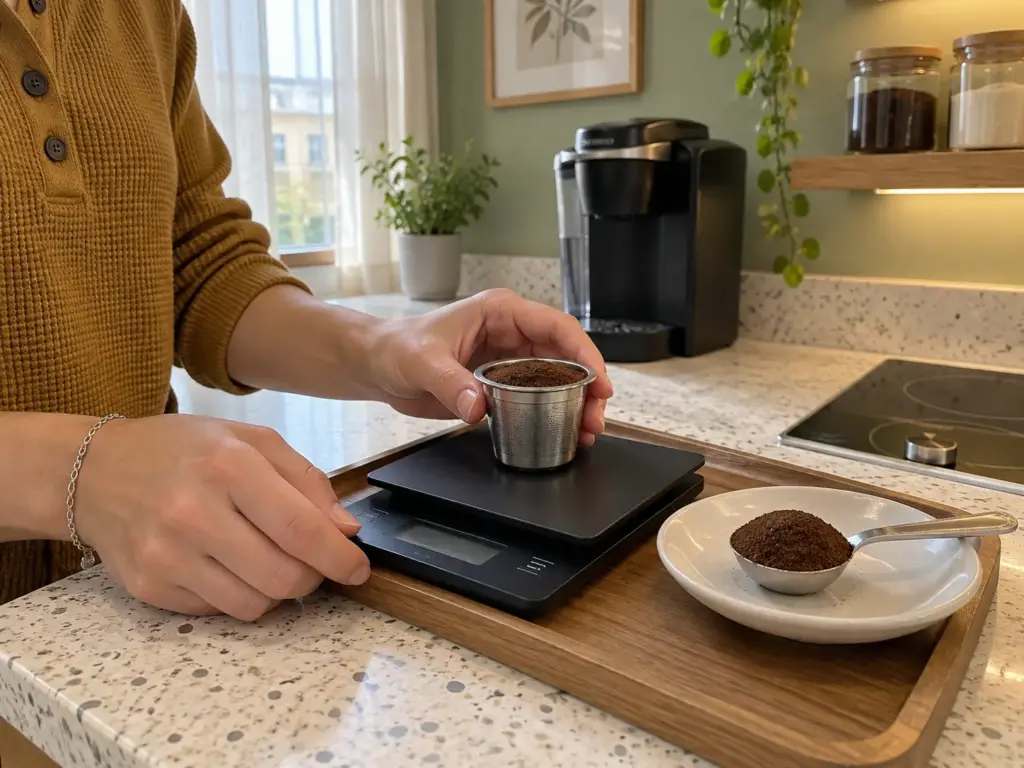
The blog’s reference ratio and what it gives per cup size
The reference here is 1:16, the ratio this blog uses as its own: one gram of coffee for every 16 grams (or milliliters) of water. It is not presented as anyone’s certified standard, only as a place to measure from.
A nominal 8-ounce brew is about 237 ml, and 237 divided by 16 is 14.8 g of coffee. A 10-ounce brew is about 296 ml, and 296 divided by 16 is 18.5 g. A brewer’s real output drifts from its button, so read these as targets, not promises.
| Brew size | Water | Coffee at 1:16 | A full 11.5 g pod gives |
|---|---|---|---|
| 8 oz | about 237 ml | 14.8 g | about 1:21 |
| 10 oz | about 296 ml | 18.5 g | about 1:26 |
| 12 oz | about 355 ml | 22.2 g | about 1:31 |
The 12-ounce row is arithmetic only, and it is the thinnest case: one pod stretched to the biggest size on the button.
Why a “full” pod can brew thin
A typical reusable holds about 11.5 g when it is filled to the top. That is a typical figure, not one weighed here, and your grind and roast will move it.
Run it against the water and the problem shows: 237 divided by 11.5 is about 21, and 296 divided by 11.5 is about 26. Turn it around and a pod holding 11.5 g reaches 1:16 at 184 ml, which is about 6 ounces. So the pod can be filled exactly as Keurig describes, everything else can be right, and the cup at 10 ounces is still weak, because the line holds less coffee than the size asks for.
That changes the first move. When the pod is already at the line and the cup is thin, the next change is the size button, a smaller size, and not more coffee heaped above the line. The amount in a pod depends on the roast and the grind, so a weight only means something for the coffee you weighed.
The one time to weigh it
A tablespoon of ground coffee is about 5 g, which is an approximation, so weigh a level one once and keep your own number. Weigh a filled pod once too, and you will know what your line means in grams for as long as you keep the same coffee.
For that one job the Hario Drip Scale Timer reads in 0.1 g steps and has a timer and a five-minute auto-off, more than the weigh needs, so it costs more than a basic kitchen scale for a task that only needs 1 g. The cheaper route is the Etekcity Food Kitchen Scale, whose 1 g steps are enough for a 10 to 18 g fill, though it cannot tell 14.4 g from 14.6 g, so a half-gram nudge is invisible on it. A scale is optional here; a scoop and a tap are enough to start. And if you want the habit behind it, weighing the coffee in grams, not scoops is the drip-machine version of the same idea.
Weigh one filled pod and one level tablespoon, once, and write both numbers down. After that you have your own grams per line, and the grind you weighed them with is the grind they belong to.
Read the Cup: Thin, Gritty, or Spilling
When the line is right and the cup is still off, the cup says which way. The order of the changes matters more than the changes themselves, because the instinct is to swap the coffee, the pod and the grind all at once and learn nothing.
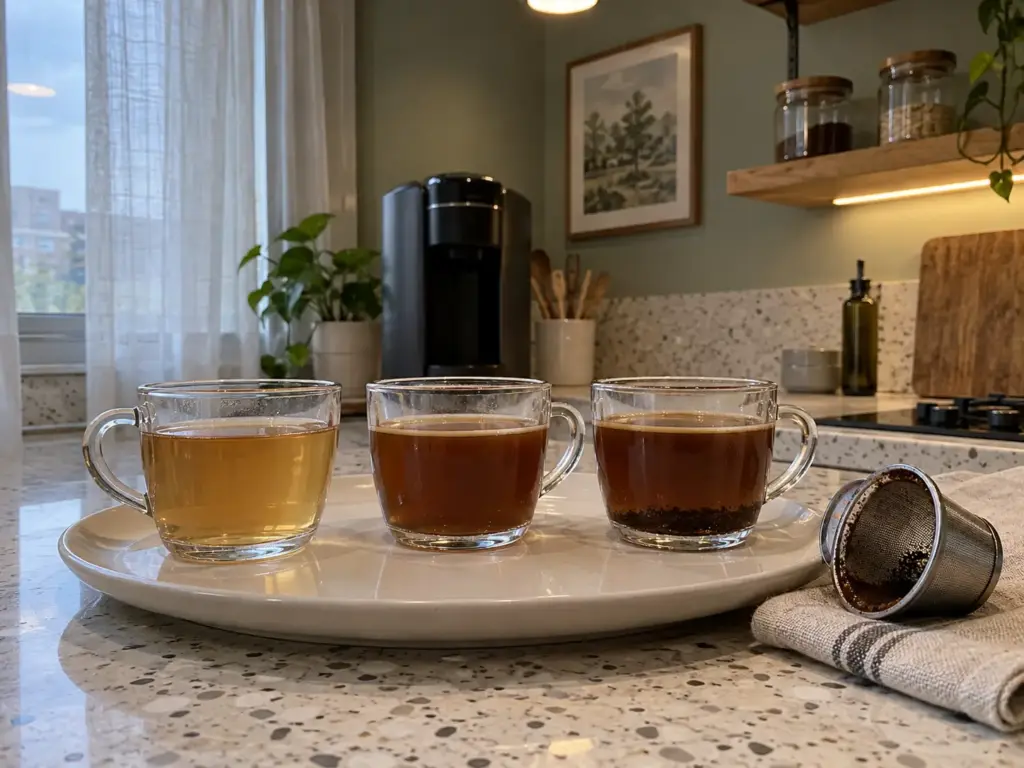
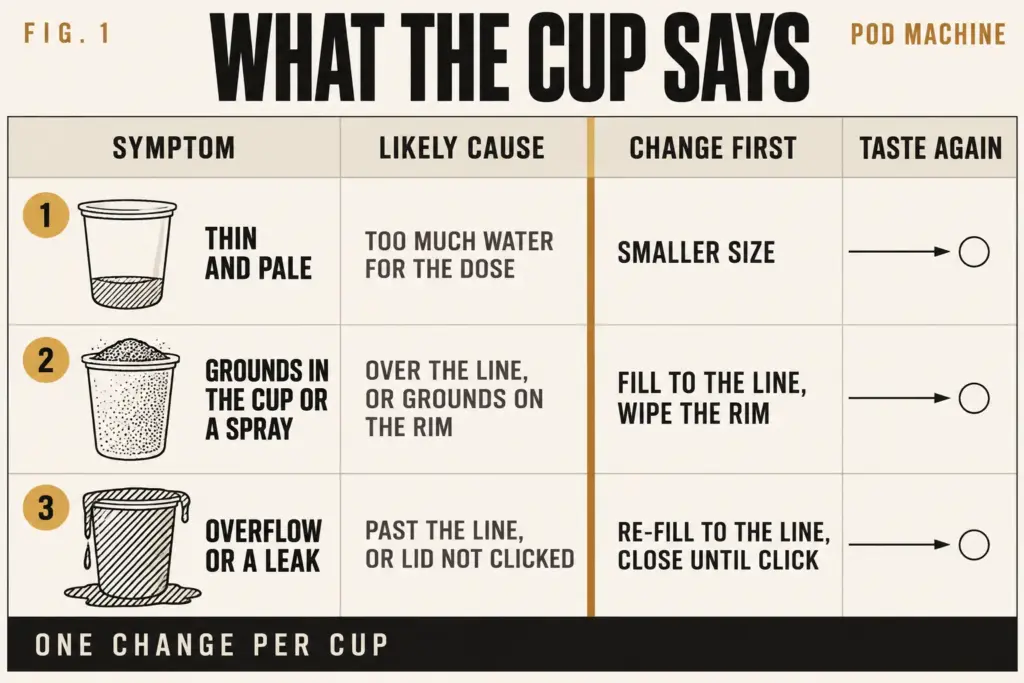
Thin and pale: size first, then grind
A thin, pale cup means too much water for the dose, so it points to the water side first. Press a smaller size and taste.
If it is better but not there, go one step finer on the grind and stay in the medium range, since very fine clogs (Keurig’s page again). How grind size moves the taste from sour to bitter explains why a finer step moves the cup toward fuller and why one step too many tips it bitter. Only if the line is already full and both of those are done does the Strong button come in.
Grounds in the cup or a spray from the top: the fill, the rim, the fineness
Grounds can pop up through the two openings on the top of the pod, and the stream can spray out, and changing the grind does not always fix it. That is the clue.
The likelier causes sit in the lid: grounds past the line, grounds on the rim so the lid is not sealed, or only then a grind that is too fine. So the line and the rim come before the grind. Re-fill below the line, wipe the rim, close until the click, and brew again.
Overflow or a leak: over the line, or the lid never clicked
Two causes, and they look the same on the counter: the pod is over the line, or the lid never reached its click. Change one at a time. Re-fill to the line and brew; if it still leaks, check the click and the rim. Never try everything.
The order, once: the fill line, then the click, then the size, then the grind, then the button, and one change per cup so that you know which one worked.
If the line is full, the grind is medium and the cup is still thin, the pod has probably stopped being the problem. Look at the size, at a clogged needle, and at scale from hard tap water that has built up inside the machine and needs descaling; these belong to the machine, not the fill.
And one flaw belongs to the reusable itself: you set the dose every time, so it will never be as repeatable as a sealed pod, and the cup will shift with the day’s scoop. A scale narrows that gap. It does not close it.
Change one thing per cup, and write the line and the size on a piece of tape on the canister. The next cup is then a real comparison and not a guess about what you did yesterday.
Month Two: Rinse, Check the Mesh, and Know When It Is Not the Pod
The pod that gave a good cup in week one is not quite the same pod later, and Keurig’s own page names the first reason: “Regularly check for and remove any coffee buildup in the mesh filter.” It gives no schedule, so the rest of this section is what to look at and when.
Rinse after every brew, deep clean weekly
After each brew, rinse the basket and the lid. Once a week, soak the mesh and rub it clean. Rinsing is quicker with the pod still warm and the grounds still moist, because a puck that has dried is the one that clogs the mesh. For the method, follow the cleaning steps on Keurig’s page for the pod you own; dishwasher and vinegar soaks are common advice, but the manufacturer’s page is the one that knows your pod’s plastic.
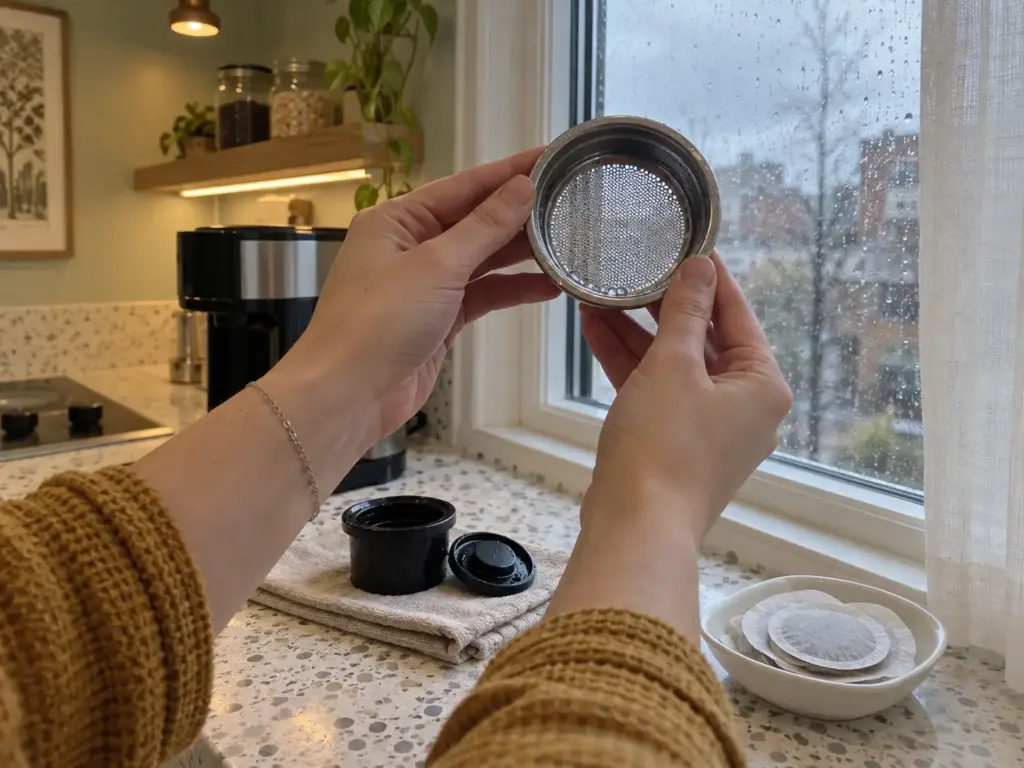
Then hold the clean mesh up to a window. If light does not pass through evenly, the water will not either, and that is the cup thinning for a reason that has nothing to do with how you filled it.
Check the mesh, and the paper disc as the free helper
A paper disc in the basket catches the finest grounds before they reach the mesh, so the mesh stays clearer between cleanings.
Keurig’s page says paper must be used with the basket that comes with the pod, never on its own. The Irmidi 300 Count Disposable Coffee Filters are made for that: they are a trade, because they add a step to every brew and one more thing to keep in stock, and they have to sit inside the basket to count. If you already clean the mesh weekly and the window test passes, you can skip them. Paper versus a permanent filter sets the two side by side.
What no source here shows about month two
Neither Keurig’s page nor any owner report describes when the thin cups come back, so there is no month-by-month pattern to hand you, and inventing one would be worse than the gap. What can be said is the mechanism: a mesh holding old grounds passes water unevenly, and unevenly passed water is how a fill that worked in week one starts giving the cup you thought you had fixed. The window test at the weekly clean is the whole check.
If your fill, size and grind are all right and the cup is still thin, you may simply have the wrong pod for your brewer’s needle, or you may want the Strong button, which the Keurig lines guide covers. A scaled-up machine and a clogged needle are the other two suspects, and neither is the pod’s fault.
Fill to the Line, Taste, Then Change One Thing
Three things carry the rest. The line is the dose, so the factory dose of a sealed pod is something you do not get, and a level fill is the habit that replaces it. One change per cup, in order, is what tells you which change worked. And the mesh against a window, a month from now, will tell you whether the pod is still passing water evenly or has started to cheat.
Tomorrow morning, fill one pod to the line, level it with a tap, click it shut, write down the line and the size on the tape, and taste. Then change one thing. If the fill is right and the cup is still weak, which reusable pod suits your Keurig’s needle is the next question, and the grind for a K-cup is the one after it.
Frequently Asked Questions
01How do I use a reusable Keurig pod?
Match the pod to your brewer, fill a medium grind level to the MAX line without packing it, and close the lid until it clicks. Then pick the size on the button, not by adding more coffee.
02Why won’t my reusable K cup work in my Keurig?
The usual cause is the wrong series for the pod, since the current My K-Cup is not for the 2.0 brewers. Next check the red lid plug on a MultiStream brewer, a pod over the line so the lid will not click, and a clogged mesh. Pods by needle type covers the fit.
03Can I use any reusable coffee pod in my Keurig?
No, the pod has to match your brewer’s series and needle type, and the listing’s model list is what to read, not the size. Reusable pods sorted by needle type lays out which suits which.
04Why is my coffee weak when I use a reusable pod?
Weak means too much water for the dose. Check the line first, then try a smaller size, then one step finer on the grind. A full pod of about 11.5 g stretched to 10 ounces or more is already thin.
05Can you use a paper filter in a reusable K-Cup?
Yes, but only inside the basket that comes with the pod, never in place of it, as Keurig’s page says. It keeps the mesh cleaner and adds one more step to each brew.


How did your cup turn out?
No comments yet. Tell us what you changed — and whether the needle moved.