
We may earn a commission when you buy through links on this page. It never changes what we recommend. How we pick
On this page7 parts
- The Grind Size for a K-Cup Starts at Your Drip Setting
- Weak Coffee From a Reusable K-Cup? Check the Brew Size First
- Then Move the Grind Half a Step, in the Direction the Cup Points
- What Goes Into the Pod: a Drip Bag, a Blade Grinder or a Burr
- When It's the Pod or the Brewer, and What Month Two Does to the Mesh
- Six Ounces First, Then Half a Step
- Frequently Asked Questions
You filled the reusable pod from a bag with drip printed on the front, pressed the button for the size of your travel mug, and got a cup that tastes like coffee-colored water, or one with a gritty layer waiting at the bottom. Those two cups point in opposite directions, and the weak one usually has little to do with the grind.
The coffee grind size for a K-Cup decides how fast hot water gets out of a small dose on a short, low-pressure pass, so the grind does move the cup. It just isn’t the first thing to move when the cup is thin. Below you get the setting to start from and why even Keurig prints two answers, the button to check before the grinder, which way to move the grind by what the cup says, what goes into the pod, and when the pod or the brewer is the real problem.
Quick Answer
Start a reusable K-Cup at the drip setting: medium, like table salt to coarse sand, never espresso-fine. Medium-fine fits a pod with a paper liner; Keurig’s French-press-coarse starting point guards a mesh that clogs. Weak but clean: brew at 6 oz first, then half a step finer. Gritty, slow or overflowing: half a step coarser.
The Grind Size for a K-Cup Starts at Your Drip Setting
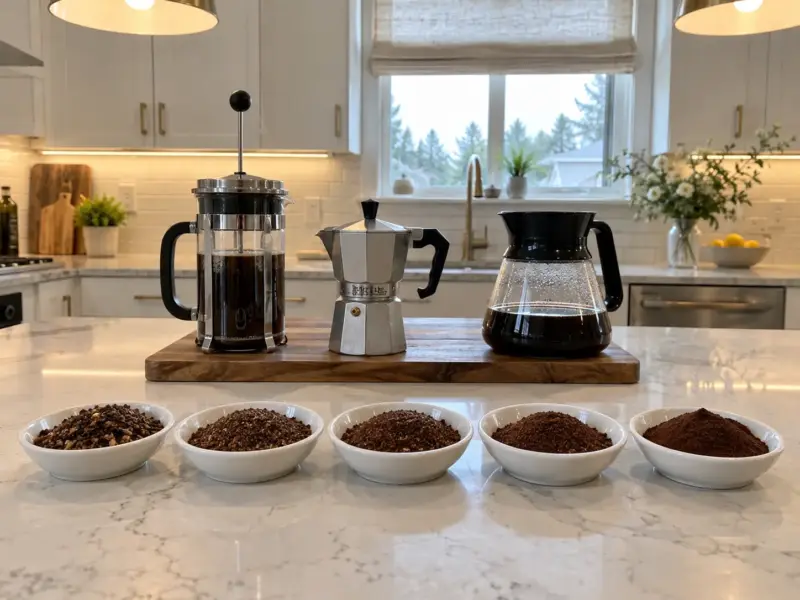
Start a reusable K-Cup at a medium grind, the setting a drip machine uses, which on the full grind size chart sits between pour-over and French press. The advice for this pod comes in three sizes, though, and the company that makes the pod prints two of them on a single page. They disagree less than they seem to.
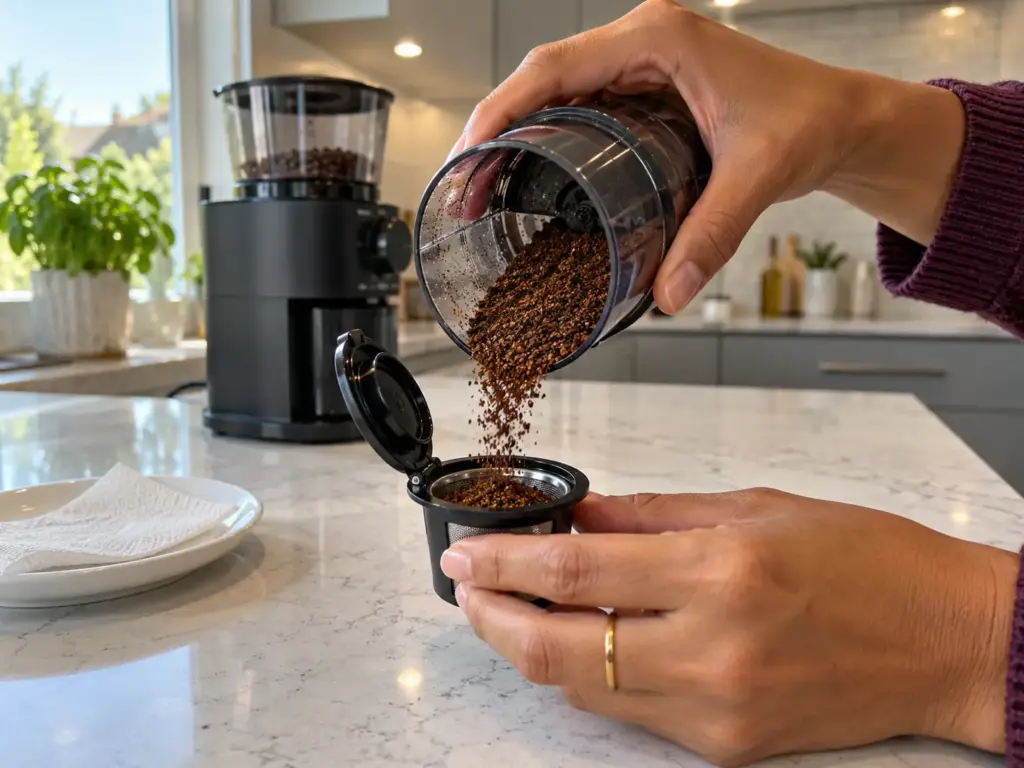
Why Keurig’s Own Page Gives Two Answers
Keurig’s instructions for the My K-Cup put the target in the tips: “Use a medium grind for optimal brewing results. Avoid using very fine coffee grounds, as they can clog the filter.” Medium there means the grind a drip machine wants, grains you can see and feel one by one.
Further down, the FAQ on the same page answers differently: “If you grind your own beans, you should start with a coarser grind similar to a French press. Avoid a fine espresso grind setting, as that may clog the screen or result in poor extraction.” Set that next to how coarse a French press grind really is and it sounds like a different pod altogether.
It isn’t. Both lines guard one hazard, a clogged mesh screen: the tip names where to aim, the FAQ names the safe side to start from when you can’t see through the basket, and both rule out espresso grind, which belongs to a machine that packs coffee into a puck and forces water through it with a pump. Neither line says half a step finer than medium is wrong; they say very fine and espresso are.
Where “Medium-Fine” Comes From
The pull toward a finer grind has a real reason behind it. The SCA ties grind to contact time in its brewing protocol, fine for 1 to 4 minutes, drip for 4 to 6 and coarse for 6 to 8, and says particle size matches the time of coffee-to-water contact. A pod brew is over well inside the shortest of those bands, which is why a pod wants a grind between medium and fine.
The other source of the word is the commercial pod. Cut open, a pod shows coffee ground very fine. Not espresso fine, but much more fine than store bought ground coffee.” But that coffee sits in a paper-lined cup, and paper holds back the fines a bare mesh lets through.
With a paper filter, medium-fine or maybe fine can work, but a fine grind carries a high risk of overflow. So medium-fine describes a pod with paper in it, and a bare mesh wants medium. That is also how to read the chart’s K-Cup row, which files the pod at medium-fine: it is where you land half a step past the drip setting, once a paper liner goes in or the cup comes out thin and clean, not a different place to start.
Finer-for-a-shorter-brew is sound physics, and on a bare mesh it runs straight into the screen. Go finer than the weave can hold back and you get sludge in the mug or water backing up over the grounds, not a fuller cup. The answers still split between medium and medium to fine, which stops looking like a contradiction once you know the answer depends on what sits under the grounds.
What Medium Looks Like Between Your Fingers
Medium feels like table salt to coarse sand: separate grains, no powder that smears, no chunks. Pinch some over a white saucer and rub it, and medium leaves distinct grains stuck to your fingertip, while espresso grind smears into a dark paste that fills the lines of your skin. A French press grind sits at the other end, gritty and closer to coarse sea salt.
That rub is worth thirty seconds before the first pod of any new bag or any new setting. If you want the longer version, with what each size looks like on the plate as well, this is how to tell fine, medium and coarse apart by feel.
Put a pinch of your grounds beside a pinch of table salt on a dark plate. If most of your grains look smaller than the salt, you are already past medium for a bare mesh, and the first thing you’ll notice is silt at the bottom of the mug, not a fuller cup.
Weak Coffee From a Reusable K-Cup? Check the Brew Size First
With the setting settled, the complaint that comes up most with a reusable pod is a thin cup, and the first thing to move for it is not the grinder. It is the button that decides how much water runs through a dose that stays the same size whatever you press.
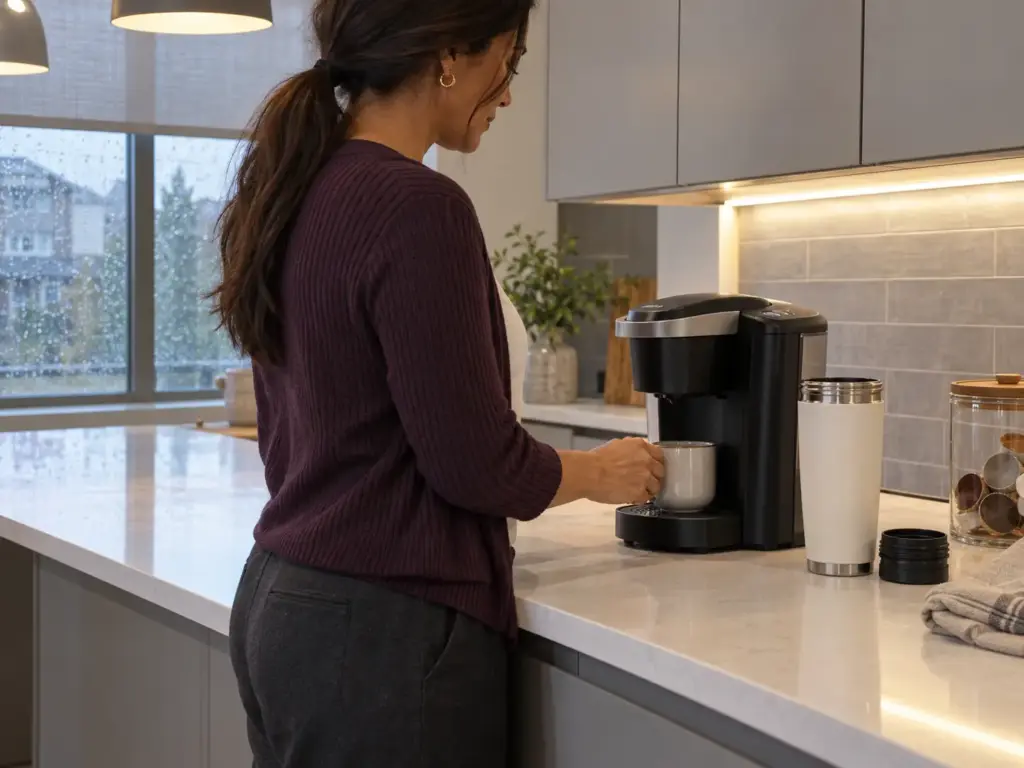
The Size Button Adds Water, Not Coffee
The travel mug holds 10 ounces, so the button goes to 10, and the cup tastes like it was brewed for somebody who likes it weaker. On a pod machine the brew size is a strength control. The brew size option is not about how much you want to drink; it is for strength. Larger=weaker.”
That same owner put a measuring cup and a thermometer under the brewer with no pod in it and got 6, 8 and 10 ounces from the three buttons, close to what they promise, with the water temperature at 177, 180 and 174°F (81, 82 and 79°C). The largest size came out a few degrees cooler than the middle one (one machine, one thermometer, and not a figure Keurig publishes). Same grounds, more water. Weaker cup.
This is where finer and stronger get tangled. A finer grind pulls more out of the same grams, but it can’t put back coffee the button diluted, and which grind makes the strongest cup is a separate question from how much water goes through it. Most K-Cups taste best at 6 ounces.
The Numbers Against the SCA’s Ratio
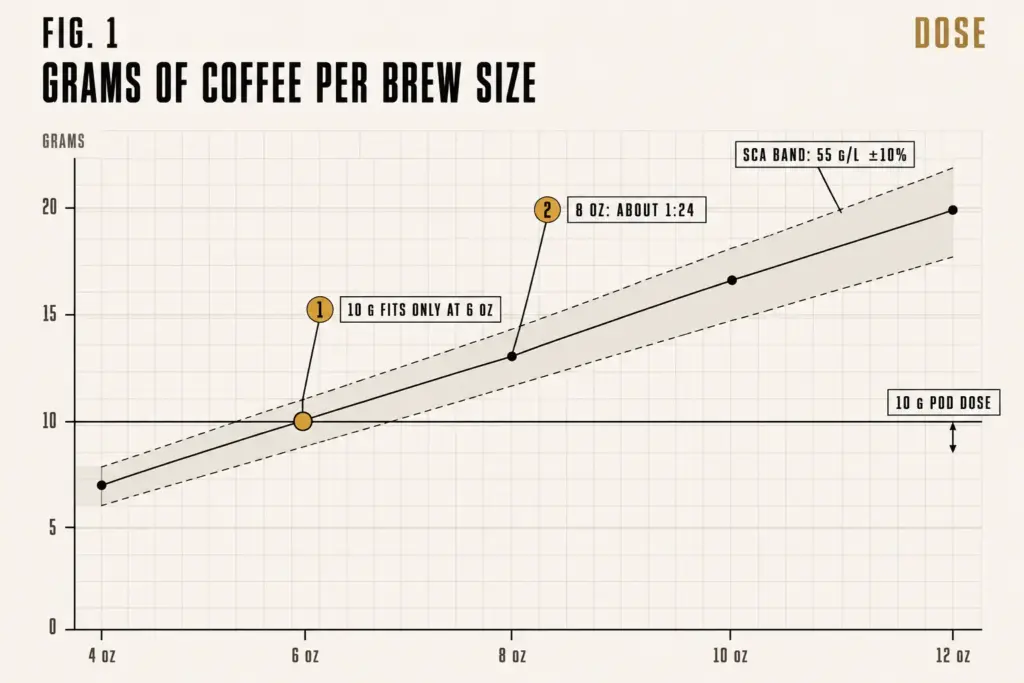
The SCA’s Golden Cup ratio of 55 grams per liter is the yardstick for the coffee-to-water ratio here, and Roastopedia gives the band in full: “55 grams of ground coffee per liter of water, with an acceptable tolerance of ±10%.” In kitchen units that is about 1.6 grams of coffee per fluid ounce of water, roughly one part coffee to 18 parts water. Run it against each button (a fluid ounce of water weighs about 29.6 grams) and this is the dose each size wants:
- 4 oz: about 6.5 g of coffee (5.9 to 7.2 g inside the band)
- 6 oz: about 9.8 g (8.8 to 10.7 g)
- 8 oz: about 13 g (11.7 to 14.3 g)
- 10 oz: about 16.3 g (14.6 to 17.9 g)
- 12 oz: about 19.5 g (17.6 to 21.5 g)
Ten grams, a common fill for a reusable pod, lands inside the band at one size only: 6 ounces, where it works out to 56 grams per liter. Press 8 and the same 10 grams brews at about 1:24, or 42 grams per liter, well under the band, and at 10 ounces it drifts toward 1:30. Twelve grams would bring the 8-ounce cup back inside. No grinder step repairs arithmetic.
Keurig prints fill lines, not grams, so the only way to know what your line holds is to weigh it once. If all you have is a spoon, two tablespoons of beans, roughly 10 grams, for 6 ounces of water matches the band above; a tablespoon is a rough measure, though, and a scale is not. The Hario Drip Scale Timer reads in 0.1 g steps and has a timer built in, more precision than a pod strictly needs, but enough to make the 9.8 grams of a 6-ounce cup a number you repeat instead of a guess. Amazon’s review summary mentions several owners whose units broke within six months, and for a scale that mostly weighs ten grams at a time it is a lot to spend; any kitchen scale that reads in 0.1 g steps does the same job.
Weigh your fill once, not every morning. Tare the empty basket, fill it to the line the way you always do, and read the number: around 10 grams belongs on the 6-ounce button, around 13 on the 8-ounce one. After that the line is your scoop, and you know which button it matches.
Fill to the Line, and Don’t Press It Down
Keurig’s rule for the dose is a line, not a spoon: fill the basket “no higher than the MAX fill line,” use the lower cup line for drinks “below 10 ounces” and the top mug line above that. Packing the grounds down to fit more in is out as well: “No, compressing grounds or filling above the top fill line may have a negative impact on brewer performance or beverage taste,” the FAQ answers. Keurig prints no grams on that page, so a gram figure for this pod comes from a seller or from your own scale.
A cup where the water runs through the middle and most of the grounds never get used points straight here. That is a dose and fill problem long before it is a grinder problem. How much to fill in detail, and which reusable pod to buy, are separate questions for the Keurig side of the site.
The order for a weak cup, free and likeliest first, with a cup tasted between each step:
- Brew your usual pod at 6 oz and taste it against the last cup.
- Fill level to the line, or weigh to the size you brew, without packing it; taste again.
- Only then move the grinder, half a step, in the direction the cup points.
If the 6-ounce cup tastes fuller with a little brightness left in it, the ratio was the problem and the grind is close. If it is still thin and watery, the next two steps are where to look.
Then Move the Grind Half a Step, in the Direction the Cup Points
With the brew size and the dose fixed, whatever is still wrong in the cup belongs to the grind or the filter, and the cup says which. A thin, sourish cup points one way, grit and a slow drip point the other, and one taste points at neither.
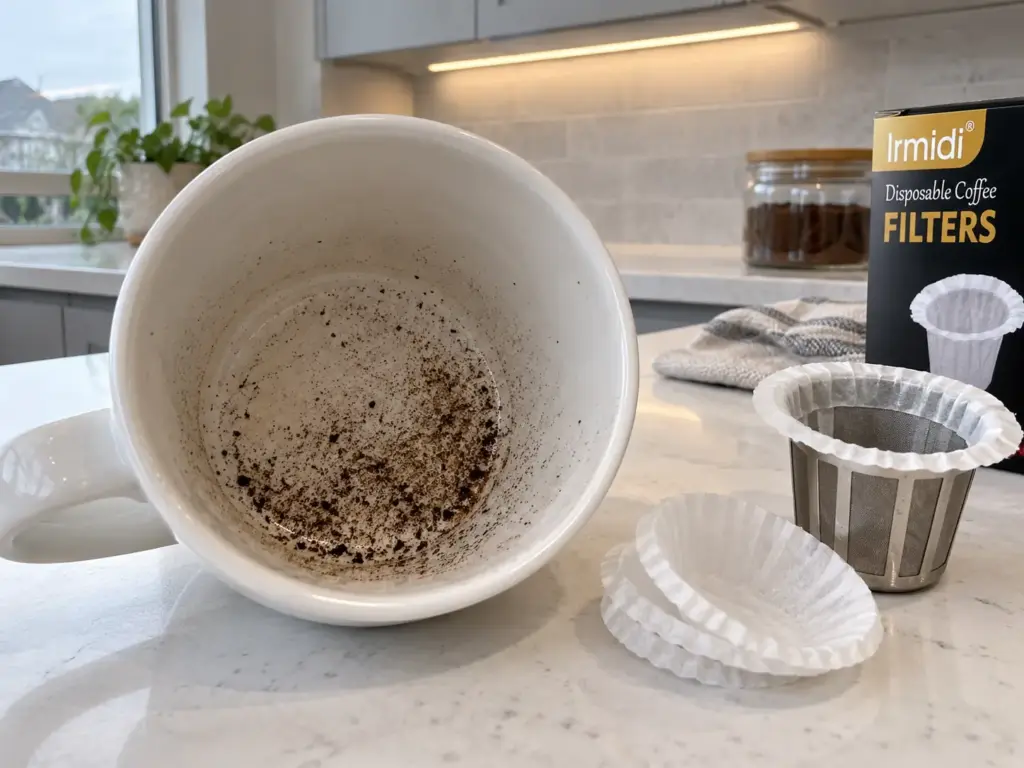
Thin but Clean: Half a Step Finer
A cup that is thin, watery and a little sour, with nothing gritty at the bottom, means the water left before it finished: it ran through grounds too coarse to slow it down. Go half a step finer. If you aren’t sure what number on your grinder is drip, find that first; half a step is one or two clicks finer than it, or a single click on a dial with coarse steps.
Then brew the same dose at the same size and taste. If it worked, the next cup is rounder and heavier, with the sharp edge gone; if it overshot, it turns harsh and drying at the back of the tongue, or silt shows up where there was none, and you come back half of what you moved. The first pod after a change still carries grounds from the old setting that were sitting in the grinder’s chute, so the second cup is the one that tells the truth.
If the dial runs out before the cup fills out, the limit may be the grinder, and that is a grinder that won’t go fine enough rather than a pod problem.
Gritty, Slow or Overflowing: Half a Step Coarser
The other direction announces itself in the mug or on the counter: a layer of sludge at the bottom, a slow drip, water spitting around the pod, a puddle from a leaking pod, or a brewer that stops with water standing on the grounds. Each one says the grounds are fine enough to pack the mesh or slip through it. Go half a step coarser, brew, and look at the bottom of the mug before you taste.
A shop grind is the usual way in. Beans ground too fine can muck things up in a K-Supreme Plus Smart. Even a pod without a liner leaves a trace: sludge in the bottom of the cup is a common complaint, and Amazon reviews often mention residual grounds.
Some of that grit is the mesh, not the grind. Cheap third-party pods can let tiny grounds through. A half-step coarser handles that case; silt from the maker’s own pod takes a different basket or a liner.
Bitter at the Right Grind Is Not the Grinder
A cup that turns bitter at a setting that tasted fine yesterday is the one taste that points at neither direction. The grinder didn’t move, so moving it now overshoots, and the likelier culprits are a pod packed down or filled past the top line, which Keurig says hurts taste, or the brewer and the water, covered further down. Check the fill first, loose and level to the line, and brew again before you touch the dial.
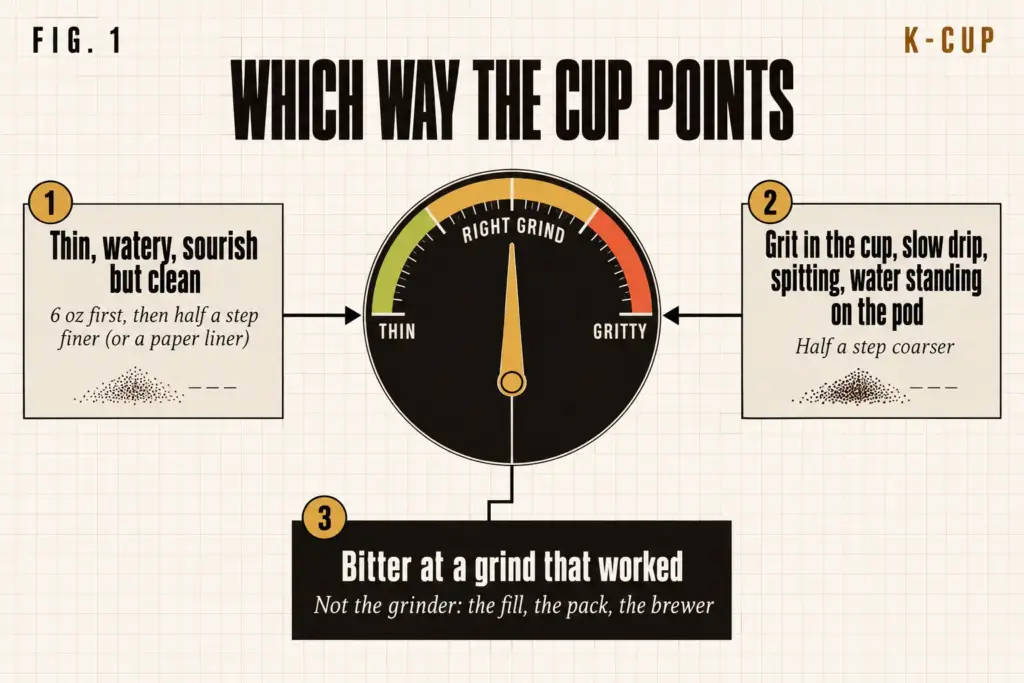
Bitter normally means coarser, and on a drip machine that rule holds. In a pod with a fixed dose and a fixed line, coarsening a grind that was right yesterday mostly trades the bitterness for a thin cup, because the grind was never the thing that changed.
A Paper Liner Is the Only Way Finer
If the cup is clean but still thin at the finest step the mesh tolerates, or you are tired of rinsing sludge out of the mug, the way to a finer grind runs through paper. A paper liner in a refillable pod can leave zero sediment, and the paper liner is also what lets you try medium-fine. Keurig’s one condition is that the paper goes inside the basket: “Never use a paper filter on its own.”
The Irmidi 300 Count Disposable Coffee Filters are paper discs sold for reusable pods on 1.0 and 2.0 brewers, and they are said to leave no silt in the cup. They are a running cost, though, one disc thrown away with every cup, and they can get expensive per filter. The listing also names a long run of pods without naming the My K-Cup basket, while Keurig points owners to its own paper filters, so hold your basket up against the listing’s sizes before you buy a box.
With a liner in, go half a step finer and brew. If the pod overflows or the brewer slows to a trickle, the paper is choking on the finer grind; come back to where you were.
What Goes Into the Pod: a Drip Bag, a Blade Grinder or a Burr
Every move so far assumes you can move the grind. That depends on what you are spooning into the pod: a pre-ground bag can’t move at all, a blade grinder moves two ways at once, and only a burr grinder gives you a step you can take and take back.
A Bag Labeled for Drip, and Why the Label Is Not a Size
The word on the bag is the roaster’s word, not a measurement. A shop’s auto drip grind can be the one that chokes a K-Supreme, and supermarket bags can also run a little finer than most pre-ground coffee. Buy the bag labeled drip, and if it runs slow or leaves sludge, the next bag goes a step coarser or gets a liner.
Skip the bag labeled espresso: there is no way to regrind coffee that’s already ground into bigger pieces, so in a bare mesh it starts at the sludge-and-overflow end. With no grinder at all, take a pinch to the shop counter and ask for drip, or take an open pod along and show the grind to the coffee shop. Remember that the pod’s coffee was ground to sit on paper.
A pre-ground bag also changes under you. Ground coffee goes stale faster than whole beans, so a bag that brewed a full cup in its first week brews a flatter, weaker one by its last, with nothing else changed. Whether that alone justifies a grinder is the question of whether grinding your own is worth it.
A Blade Grinder Makes Grit and Weak Coffee at Once
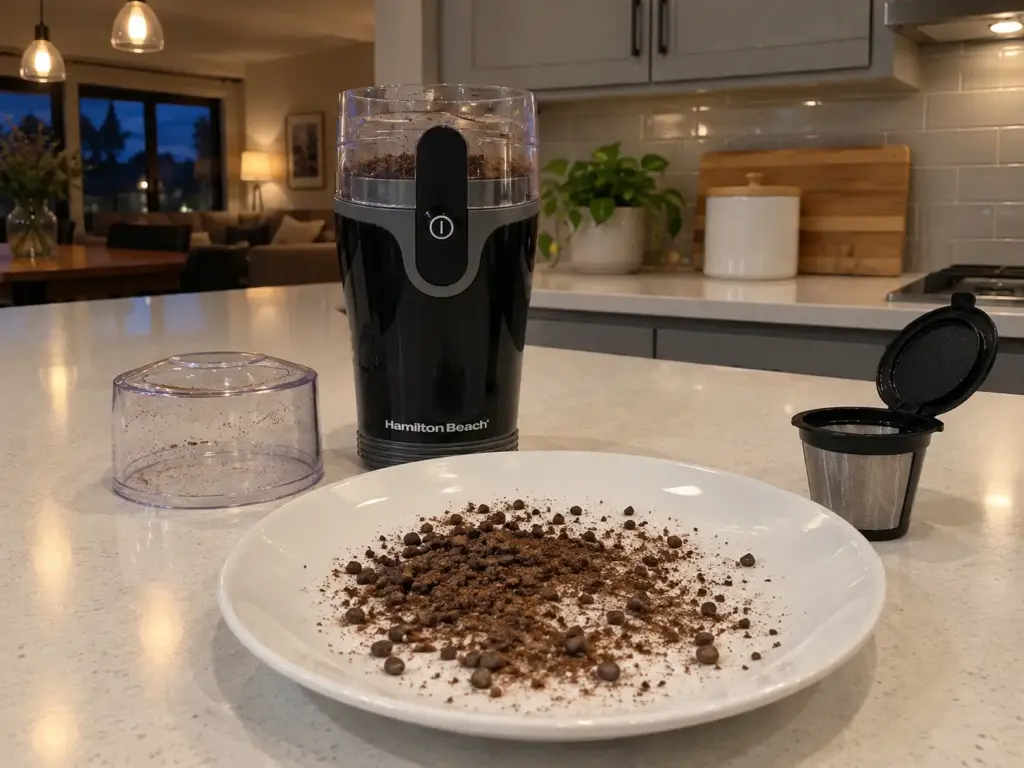
A blade grinder doesn’t grind to a size; it chops for as long as you hold the button. The result is dust and chunks in the same dose, and a mesh basket sorts them badly: the dust slips through into the mug as silt while the chunks sit in the basket under-extracted. That is why a blade grinder makes a cup sour and bitter at once, and in a pod it shows up as a cup that is gritty and thin together, which no half-step in either direction repairs.
Tip the catch cup onto a white plate and you can see it: a film of fine dust under the larger pieces. That dust is what ends up at the bottom of the mug.
The Hamilton Beach Fresh Grind is the blade grinder a lot of kitchens already own, stainless blades and one button, and it is here as the source of that gritty-and-weak cup, not the answer to it. The motor can burn out easily, and Amazon’s review summary includes units breaking down after 4 months. Short pulses are also the least uneven way to use it for a pod, and how long to run a blade grinder covers the timing.
A Burr Grinder Gives You a Step You Can Repeat
The half-step method needs something to count. A burr grinder crushes beans between two burrs held a set distance apart, so each number on the dial means the same size every morning: find the drip setting, go one click finer when the cup asks for it, and come back to exactly where you were if it overshoots.
The Baratza Encore is the usual budget answer: 40 mm conical steel burrs and 40 numbered settings, which leaves room to move one click at a time around medium. Static is the complaint that keeps coming back in its reviews, grounds clinging as they pour out of the bin, which with a pod means a mess around the basket rather than a worse cup. Durability reviews pull both ways, and some units die within months.
A burr grinder is the obvious upgrade, and for the grind it is the right one. It can’t lift the ceiling of the pod itself, though (more on that below), so if your cup is still thin at 6 ounces, filled to the line and half a step finer, a grinder is not the next thing to buy. For a blade-grinder owner stepping up, a cheap burr grinder that stays even covers the budget end.
When It’s the Pod or the Brewer, and What Month Two Does to the Mesh
A cup that stays weak or keeps spitting after the button, the dose and a half-step each way is no longer a grind question. The pod may not fit the brewer, may not be seated, or may be clogged with weeks of oil and fines.
Check the Brewer Before the Grinder
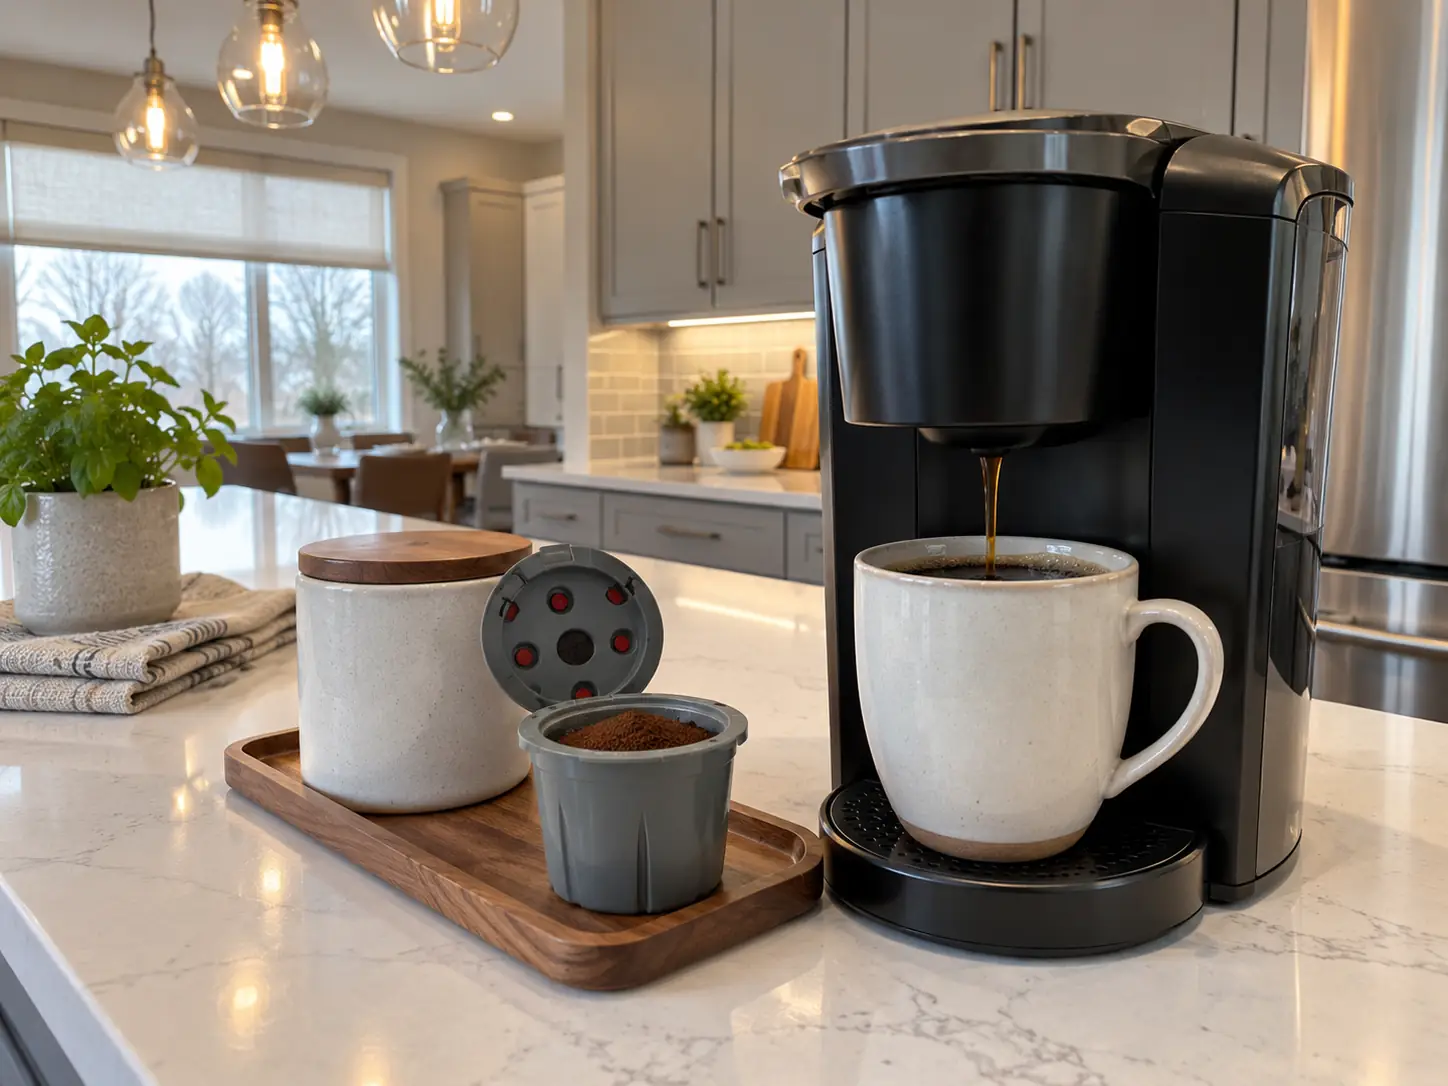
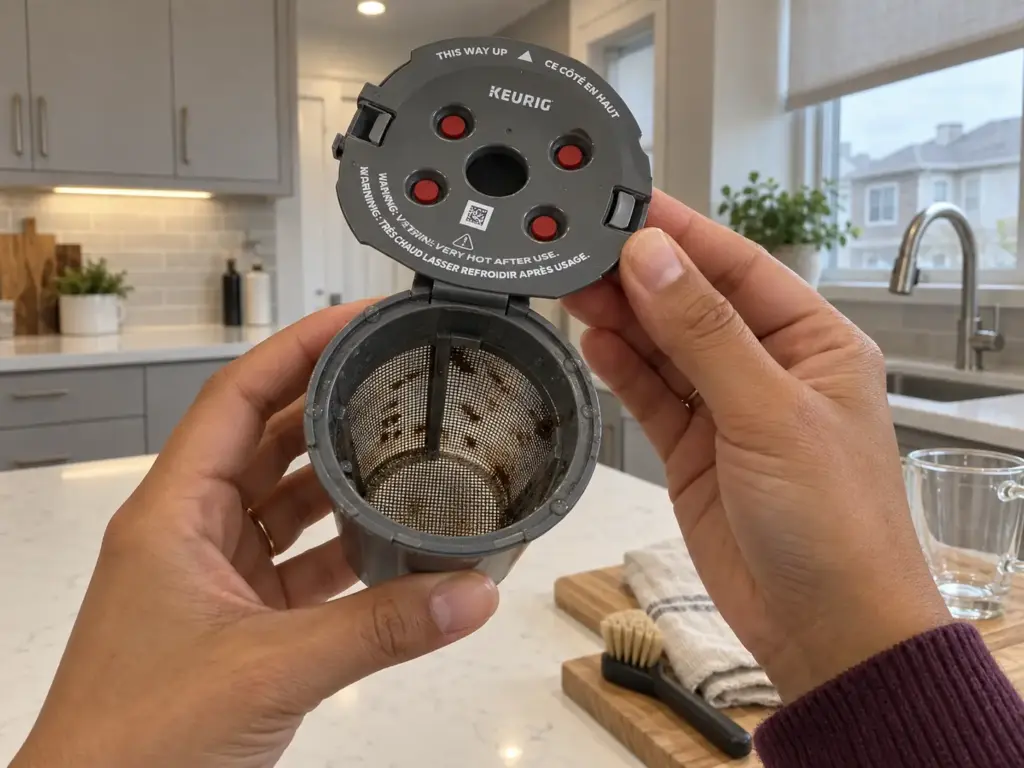
The Keurig My K-Cup Reusable Coffee Filter in its 2025 design is the maker’s own reusable pod for its single-serve brewers: a stainless mesh basket in a plastic holder with a lid, a MAX line plus the cup and mug lines, and a red lid plug. It is the only pod here whose maker publishes a grind, a fill rule, a compatibility chart and a care list, and the chart is the first thing to read when a pod brews badly.
Keurig’s chart says yes to single-stream and MultiStream home brewers and to the K-Brew + Chill, and no to Keurig 2.0 brewers (the K-200, 300, 400 and 500 series), Keurig Commercial machines and the K-Crema. On a MultiStream brewer the red plug comes out before you brew. The pod has to sit flush in the holder with its bottom opening “correctly aligned with the exit needle of the appliance,” in Keurig’s words, and a pod that doesn’t brews weak or spits whatever the grind.
Fit is also where the older listing’s reviews turn: 323 of the 528 that mention it are negative, one of them reading “it does not fit my machine at all.” Check the brewer family on the chart before you blame the grind.
If the cup went weak right after a new brewer arrived, look at the red plug under the lid before you touch the grind. A MultiStream brewer wants it out, and a pod carried over from an older machine may still have it in. It also comes out for every wash and goes back in for brewing on the other brewers, which is an easy step to lose track of.
Month Two: Buildup in the Mesh
A setting that made a good cup in the first week starts running slow and spitting a few weeks later, and the grinder hasn’t been touched. Oil and fines build up in the weave, and a half-blocked mesh behaves like a finer grind: slower flow, more spitting, a brewer that stops with water sitting on top. Keurig’s care list covers it in its own words: rinse after each use, wash more thoroughly at least once a week (the top rack of the dishwasher is fine), and “Regularly check for and remove any coffee buildup in the mesh filter.”
Tap last week’s grounds out of the filter basket, rinse it, and hold the mesh up to a window. Even light through the weave means it is clear; patchy light, darker where oil has filled the holes, means the basket needs its deep wash before the grinder gets another click.
Then brew one cup at the setting that used to work, with the same fill at the same size. If it runs at its old pace and tastes the way it did in the first week, the mesh was the whole problem and the grinder stays where it is. If it still drags after a clean basket, that is the moment for half a step coarser, and not before.
The plastic around the mesh is where these pods wear out. On the older model’s listing the repeated complaint is the mesh base coming away from the plastic, and Keurig’s own list ends with inspecting the filter for damage and replacing it if needed.
Where the Reusable Pod Tops Out
The pod carries its own flaws, and they belong next to the advice. On the current listing, 21 of the 33 reviews that mention durability are negative, and the weak spot is the filter lid, held on by a very fragile plastic hinge pin. Without a liner it leaves sludge, and newer MultiStream brewers are reported to make very weak cups.
And there is a ceiling no setting lifts. There is not enough room in a pod for a proper brew ratio. A K-Slim can still brew a thin cup even with finer grounds, darker roasts, more coffee or less, a pre-soak, the red plug and a paper liner.
The grind fixes the direction a bad cup is off. It doesn’t fix how small the bed of coffee in a pod is, and once the 6-ounce button, a level fill and a clean mesh are in place, the choices left are about the pod and the brewer, not the grinder.
Six Ounces First, Then Half a Step
Start the reusable K-Cup at your drip setting, and judge the grind by how it feels between your fingers rather than by the word on the bag. When the cup is weak, the 6-ounce button and a level fill to the line come before the grinder, because no grind repairs a ratio the button diluted. When the cup is still off after that, move half a step at a time in the direction it points, finer for thin and clean, coarser for grit and a slow drip, and wash the mesh before you blame the setting.
A month from now, hold the empty basket up to the light and brew one cup at the same setting; if it runs slower than it did in the first week, look at the basket, not the beans.
Tomorrow, change one thing: brew your usual fill at 6 ounces and taste it against today’s cup. If it tastes fuller and a little brighter, the grinder was never the problem.
Frequently Asked Questions
01What is the best grind size for a Keurig My K-Cup?
The best grind for a Keurig My K-Cup is medium, the setting a drip machine uses, about the feel of table salt to coarse sand. Go half a step finer only if the cup is thin but clean, or with a paper liner in the basket. Never espresso-fine: it clogs the mesh.
02What grind size is a Keurig coffee maker?
A Keurig coffee maker has no grind size of its own; it brews whatever sits in the pod, and for a reusable pod that means starting at medium. Keurig’s FAQ suggests starting a little coarser, and you move finer only while the cup stays clean.
03How much ground coffee do I put in a reusable K-Cup?
Fill the basket to the line without pressing it down; about 10 grams brewed at 6 ounces lands inside the SCA’s ratio of 55 grams per liter. The same dose at 8 ounces makes a weaker cup, so use the smallest button or add grams.
04Is it cheaper to grind your own coffee than buy K-Cups?
Run the arithmetic with today’s prices: a reusable pod holds about 10 grams, so a 12-ounce bag, roughly 340 grams, fills about 34 pods. Divide the bag’s price by 34 and compare the result with the per-pod price on a box of K-Cups.
05Why is my coffee gritty in a reusable K-Cup?
Fines are slipping through the mesh, because the grind is too fine, it came from a blade grinder, or the mesh is cheap or worn. Go half a step coarser first; a paper liner inside the basket catches what is left.


How did your cup turn out?
No comments yet. Tell us what you changed — and whether the needle moved.