
We may earn a commission when you buy through links on this page. It never changes what we recommend. How we pick
On this page8 parts
- Coffee Grind Size for Pour Over Is a Band, Not a Number
- Why the Dripper and the Paper Move the Setting
- Read the Drawdown, Then Taste, Then Move One Step
- More Coffee, Deeper Bed: Why Two Cups Drain Slower
- Your Grinder's Numbers Are Its Own
- The New Bag and the Setting That Stops Working
- Time Tomorrow's Drawdown, Then Move One Step
- Frequently Asked Questions
You set the grinder to the word a chart gave for a V60, medium-fine, poured your water, and the bed drained in barely two minutes; the cup tasted thin and sharp. Or it went the other way: the water sat on the grounds for five minutes and what came through was muddy and bitter.
Both cups point somewhere, and neither one points at the chart, because the coffee grind size for pour over depends on a grinder and a dripper that chart has never seen. Sour means the water left the grounds before it had pulled enough out of them, bitter means it stayed too long, and the order of drippers from the finest setting to the coarsest is the only thing the sources all keep. Below: where your dripper starts in the band, how to read the drawdown and the cup, and what moves the setting when the cup size or the bag changes.
Quick Answer
A pour-over wants a medium to medium-coarse grind, about the feel of coarse sand, and the dripper shifts it: coarsest for a Chemex and its thick paper, finer for a V60 or a Kalita Wave, and the V60 stalls first if you go too fine. Fast and sour: one step finer. Slow, muddy or bitter: one step coarser.
Coffee Grind Size for Pour Over Is a Band, Not a Number
Ask where a V60 grind belongs and each source you check gives you a different word, which is maddening when you are standing at the grinder with the beans already weighed. It is also the first useful thing to know, because it tells you not to trust the word. For every brew method side by side, there is the full grind size chart, method by method; this page stays with the dripper on your counter and the cup it makes.
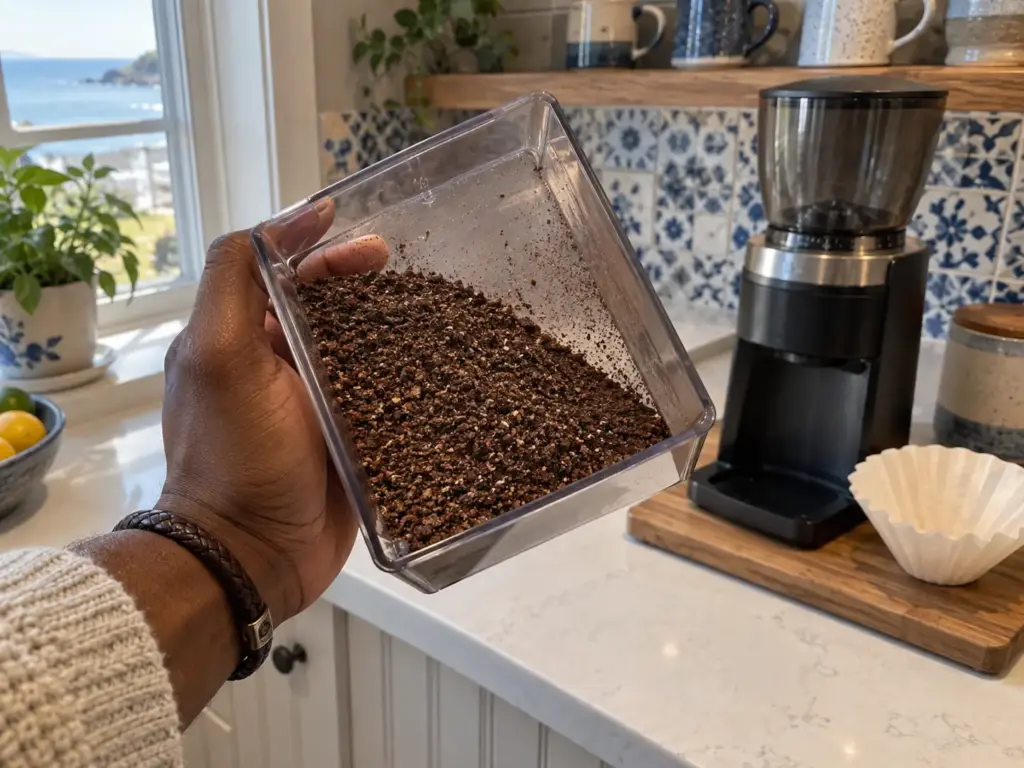
What “medium” and “medium-coarse” look like at the counter
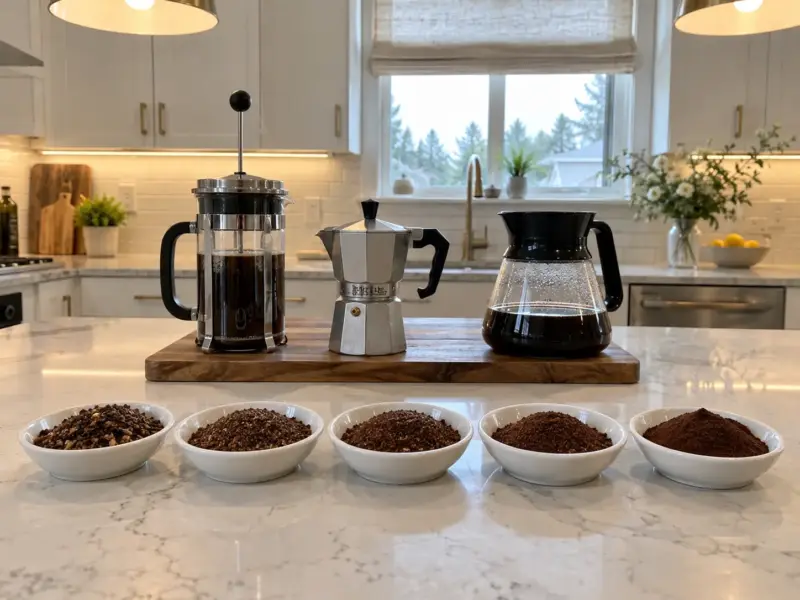
The pour over grind size for a paper filter runs from medium to medium-coarse. At the counter that looks like coarse sand, the sandbox kind: separate grains you can see one by one, gritty between two fingers, no powder clinging to the side of the grinder’s catch cup. It sits between an espresso grind, close to flour, and the coarse grind a French press wants, closer to sea salt.
Those words are texture references, not measurements. A grocery-store grinder’s medium, a blade grinder’s medium and a burr grinder’s medium land in three different places, and two burr grinders marked the same way still disagree.
The closest thing coffee has to a written grind standard is a spread rather than a size: the Specialty Coffee Association’s cupping protocol asks for grounds slightly coarser than typical paper-filter drip, with 70 to 75 percent of them passing through a U.S. No. 20 sieve. That rule was written for cupping, not for brewing at home.
It still says something true about every grind you will make: there is no single particle size in the pile, only a range, and the range is what the water meets.
Why two charts give the same V60 two different words
Take the V60 alone. Counter Culture’s pour-over guide treats it as the fine end of the method (“If the grind is fine, like with the V60,” it says when explaining brew times).
The Basic Barista puts the V60 at its best in the medium to medium-coarse range. Fine, medium-fine, and medium to medium-coarse, all for the same plastic cone.
The Kalita Wave comes out worse. The Basic Barista’s own table places the Wave finer than the V60, while its text says the Wave “can handle slightly coarser grinds than a V60.”
None of them is wrong about their own cup. Each one is describing a setting on their own grinder, and a word like medium-fine is a word about somebody else’s burrs. Put two piles from “the same setting” on two different grinders side by side under a window and they do not look alike: one carries a dusting of fines around the grains, the other more chunks, and the eye catches that spread long before it could judge an average.
What survives every source is an order, not a word. The Chemex wants the coarsest grind of the common drippers. The V60 is the dripper that stalls if you push it too fine. And the direction of a fix never changes: a sour cup goes finer, a bitter one goes coarser, one step at a time.
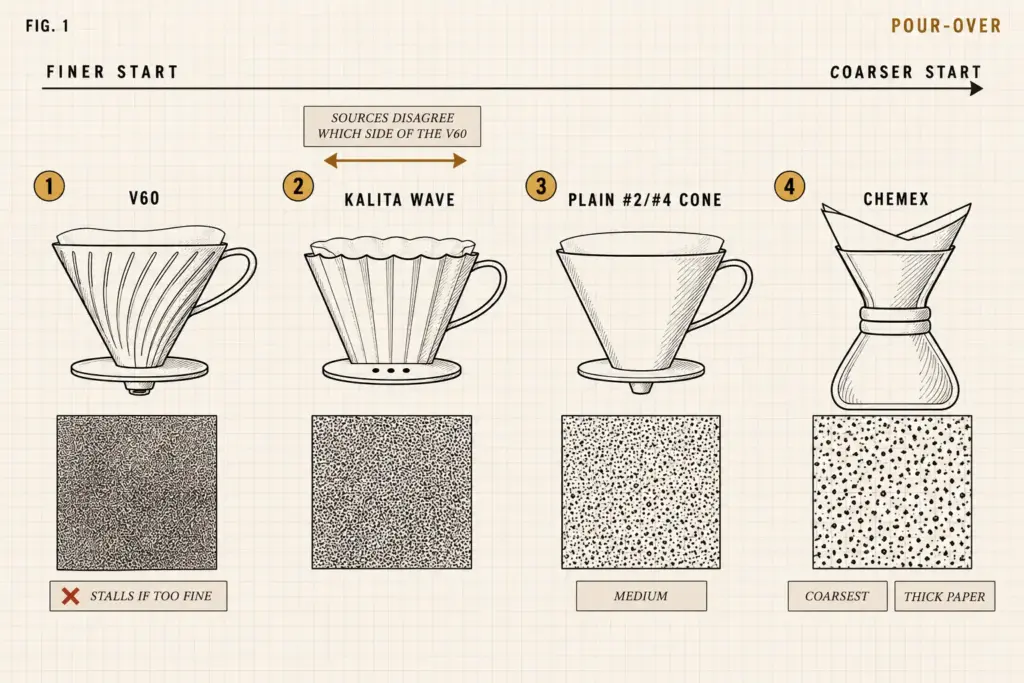
So start from the order and the band. The word gets you into the band; the cup picks the notch inside it.
What a single grind step does in a blind test
In an SCA and UC Davis study of brew basket shape, the researchers reported: “Surprisingly, however, our triangle tests also revealed that our non-expert panellists were not able to tell the difference in grind size.” The setup was a set of triangle tests with 45 non-expert tasters: three cups each, two identical and one different, and the job was to pick the odd one. Swapping a flat-bottom basket for a cone was detectable, with 25 of the 45 picking the odd cup at a medium grind, a p-value of 0.004, when a third of the panel would have guessed right by luck alone. Swapping the grind was not, even though the medium grind had a median particle size of 1,065 microns and the medium-fine one 799, which the authors call “a 25% difference in size.”
A trained panel then described what the shape changed. In a light roast, the cone gave more citrus, berry and sour notes and the flat bottom more dried fruit, sweetness and florals; in a dark roast, the cone came out much more bitter. So the brewer’s geometry moved the cup in ways people could taste.
Read the result with its limits in the same breath. These were automatic drip machines with swappable baskets, not a V60, a Chemex or a Wave. The tasters were ordinary coffee drinkers, the grind change was one step, and the study does not say grind is unimportant. What it does say is useful at home: the brewer’s shape is a variable a chart leaves out, and a single step on the dial can be hard to taste blind, so change one step on purpose and taste the two cups against each other.
Brew the two cups one step apart back to back, with water from the same kettle, and taste them only once both have cooled to the same warmth. A hotter cup hides sourness, and a cup that sat several minutes longer than its partner tastes different for that reason alone, which is exactly the difference you do not want to mistake for the grind.
Pictures run into the same wall. Judging grind size from a photo of grounds is hard, and the answer depends on the brewer, the beans and the dose. Even brewers with years behind them find it hard to judge by pictures alone.
A photo can put you in the band. It cannot tell you where in the band your cup wants to be, which is the problem behind how to tell what grind you actually have.
Why the Dripper and the Paper Move the Setting
If the one thing every source agrees on is an order of drippers, then the dripper is doing part of the work a chart gives to the grinder. So is the paper inside it. Each of the common drippers holds the water back in a different place, and that place decides where your first setting goes.
The V60, where the grind is the tap
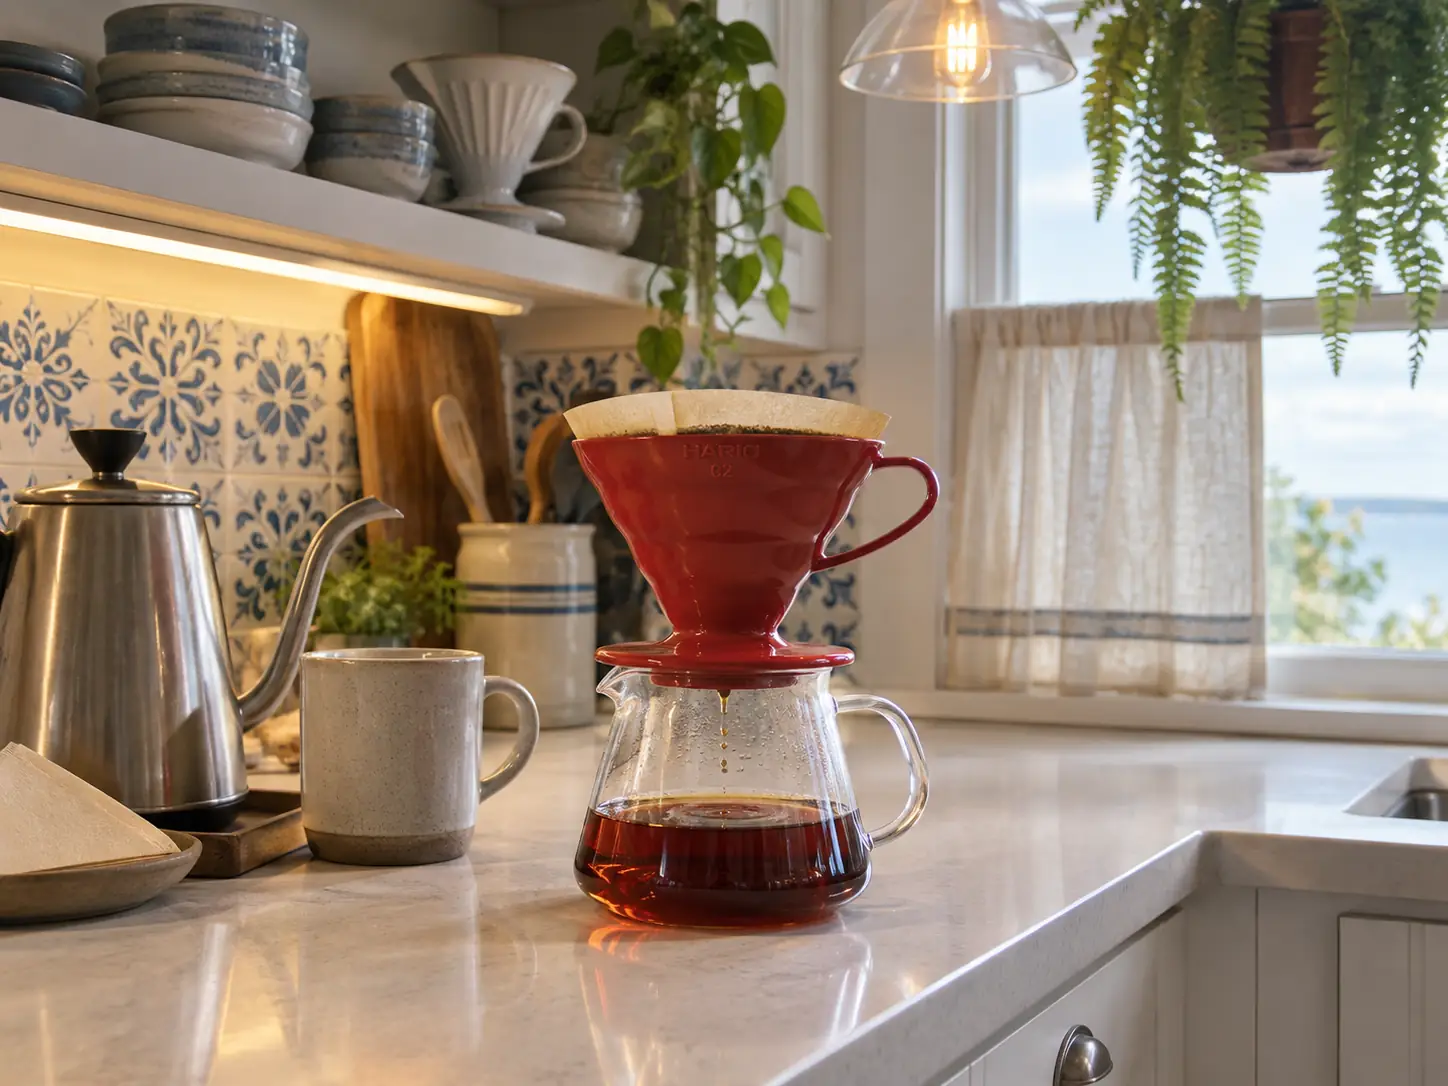
A V60 is a true conical brewer with spiral ridges and one large hole at the bottom, lined with a thin paper. Nothing in that design slows the water except the bed of coffee itself. On a V60, the grind has to regulate the flow, because the filter is very thin.
That is why this dripper punishes a grind that goes too fine. A few more fines than it can handle wash down into the tip of the cone, pack against the paper, and the bed seals.
The plastic Hario V60 size 02 is where most people start: the single hole, the spiral ridges, room for 1 to 4 cups, and Hario’s size 02 papers, which are sold separately. It rinses clean quickly. The complaint that repeats is the hole itself: it can be too large, which is the grind-as-tap design showing itself, since at a setting that is too coarse nothing else holds the water back. It may not sit perfectly, but it works fine, so check it on your own mug before the first pour.
The V60’s flow also depends on its paper more than most people expect. A light roast at this dose can stall on a V60 when the grind is too fine, and the brew time shows it. The white papers the café stocked “take longer to drain and leave the coffee with a kind of grittiness”; the brown Hario papers drained a little faster and tasted better, and the spent bed looked fine after every brew. Filter papers differ by vendor, and their drawdown times differ too, so brew time alone is a weak guide.
A slow drawdown normally means grind coarser, and on a V60 that usually works. It stops working once the grinder is already near its coarse end and the brew still runs long, as in that café: past that point the paper is the suspect, and changing the paper is the better move before touching the dial again. The Basic Barista puts the order in one line: “Filters dramatically change resistance. Dial filter first, then grind.”
It cuts the other way too. Papers differ in flow rate, and a faster paper helps with very light roasts, which tend to clog the filter.
Dial in within one box of papers. When a new brand or a new pack comes out of the cupboard, brew the first cup at your old setting and time the drawdown before you move anything. If the time shifts with the same coffee, the paper moved it, and one step on the dial is the size of correction to try first. Change the paper and the grind on the same morning and you will never know which one did it.
The Kalita Wave, where the pour shares the job
A Kalita Wave is a flat-bottom brewer with three small holes and a fluted paper that keeps the bed off the walls. The holes restrict the flow on their own, so the water spends time in the grounds whatever the grind. That is the moderator’s point about the Wave: “the grind doesn’t have to regulate the flow as much,” because your pour can do part of it. Pour in steady pulses from a gooseneck kettle, keep the water level even, and the Wave forgives a grind that a V60 would not.
This is also the dripper the sources cannot place with confidence. Start the Wave at the setting you would use for a V60 and let the drawdown say which way to go.
The Kalita Wave 185 in stainless steel weighs about 120 g, puts those three small holes under a flat bed, takes only Kalita’s Wave 185 papers and is sold for 2 to 4 cups. It is tiny and right for a 6 to 8 oz cup, which is closer to the truth. It can look and taste like tin, and it is very small. The papers are Kalita’s own shape, so the cone filters in your pantry will not stand in when you run out.
The Chemex and its thick paper
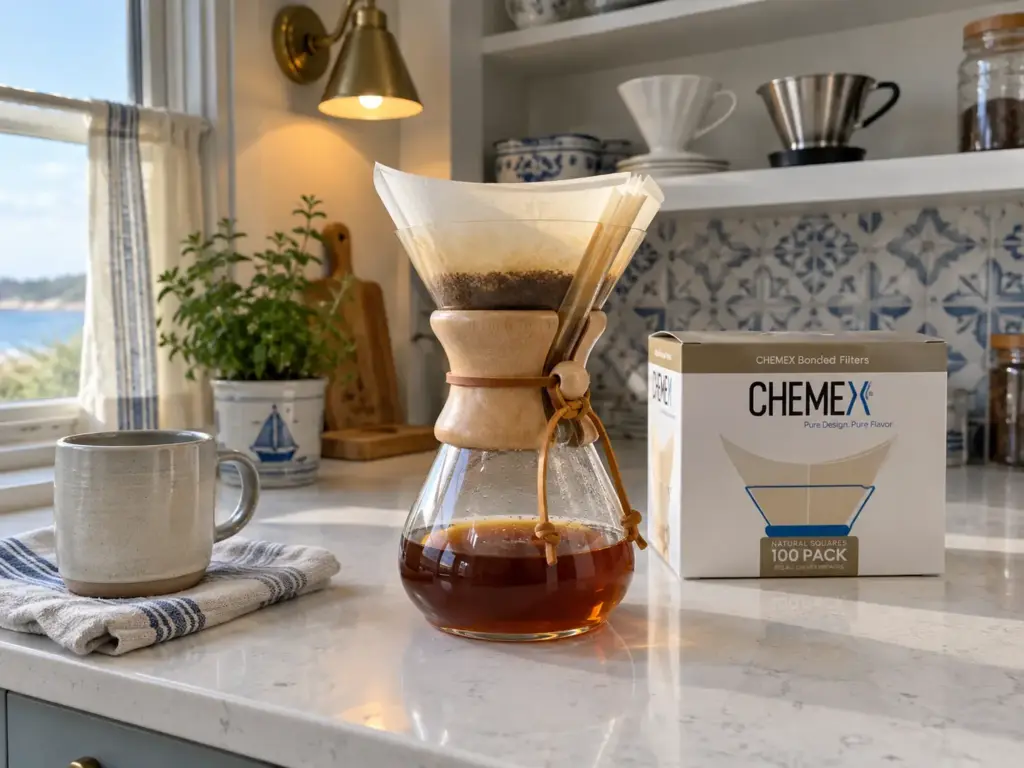
Chemex’s bonded filters are heavy, and the maker says so: its listing claims the “heavy weight bonding makes them 20-30% thicker.” Fold one into the glass the way the maker says, with the three-layer side against the pouring spout, and hold a spare up to a window next to a V60 paper: you can see the difference in weight before any water touches it. That thick filter drains slowly, so the Chemex wants the coarsest grind of the group, and the paper is the reason.
With genuine Chemex filters, “halfway between medium and coarse” works; without them, “you need a finer grind.” The paper is part of the setting, which means a box of thinner generic squares turns the same dial into a fast, sour brew.
The CHEMEX Classic 6-cup, bundled with 100 bonded square filters, is borosilicate glass, and the bundle is the point here: it brings the genuine paper this whole setting depends on. Its six cups are 5 oz cups, which is where the complaint about fewer cups comes from. The coffee does not stay hot in the glass for long, and the thick paper is a running cost you keep paying, on top of the kettle you need to pour with if you do not own one yet.
The plain cone already in your cabinet
A lot of pour-over happens in a plain cone: a porcelain or plastic Melitta-style dripper with one small hole or three, a #2 or #4 paper, a mug underneath. Start with the one you already own. Cone material and hole count change how a grind behaves, so the same setting can clog one cone and not another.
A cone like this is a drip machine’s basket without the machine, so begin where the grind for a drip coffee maker begins, at medium, and read the drawdown from there. Melitta’s own listing for its porcelain cone says to “Scoop in finely ground coffee,” while the small holes already slow the water. Follow the listing, and if the bed pools and the cup turns bitter, that is the restriction and the fine grind stacking up; one step coarser is the correction.
If you do not own one, the Melitta 1-cup porcelain pour-over cone in glossy black is the plain version: one-cup porcelain, a small window to watch the mug fill, and a starter pack of #4 papers (its long description says #2 or #4, and some buyers find the #4 does not fit right). The window is where the complaints gather. The coffee can dribble to the outside through the little window, and it runs down onto the base and does not sit securely on narrow mugs. It is heavy and top-heavy, so give it a wide mug.
Read the Drawdown, Then Taste, Then Move One Step
The dripper gives you a starting band. Which side of that band you are on, the brew tells you twice, once while it drains and once in the cup, and only then does the dial move. Across every brew method that link is laid out in what the grind changes in the cup; for a pour-over it comes down to four moves, in this order:
- Watch the drawdown after the bloom and the last pour: does the bed drain steadily, or does water pool on top?
- Taste the cup: sour and thin, or bitter, muddy and dry?
- Move the grinder one step in the direction the cup points.
- Brew again with the same dose, the same paper and the same water, and taste.
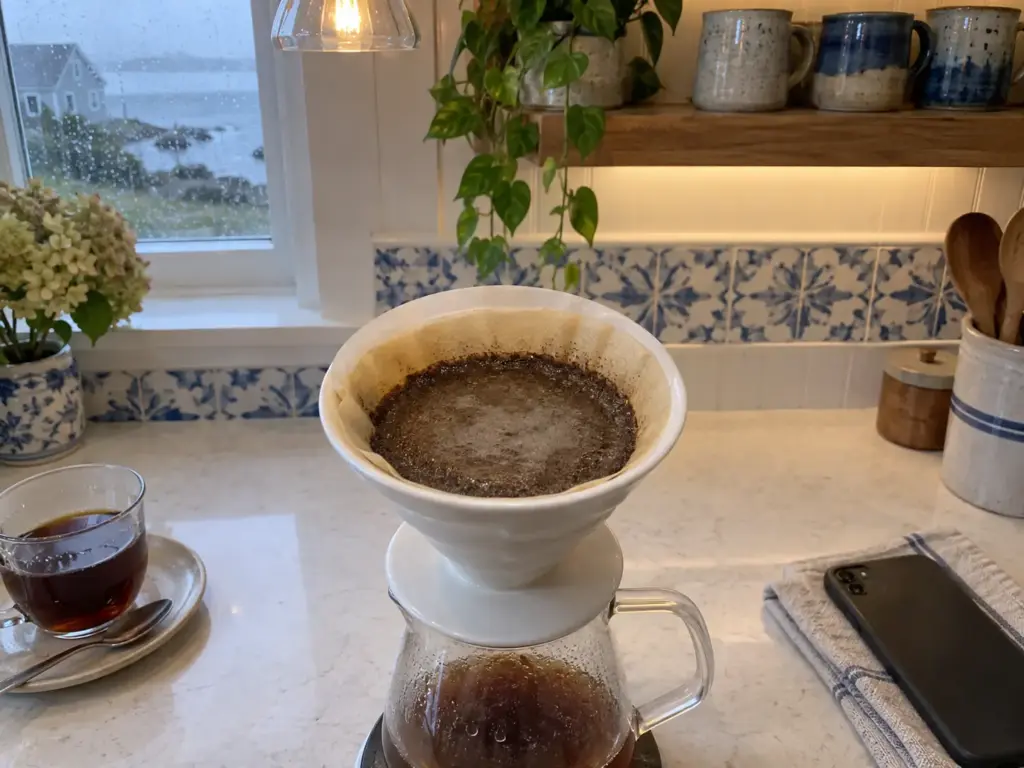
Fast and sour: one step finer
Sour, sharp and thin mean the water left before it finished. As Roastopedia’s summary of the Golden Cup Standard puts it, “Values below 18% indicate under-extraction, producing sour, sharp, or thin-bodied coffee.” Past the top of the range, above 22 percent, the cup turns bitter, dry and astringent. Grind is one of three levers on that number, along with contact time and water temperature, and this section moves only the grind.
The stopwatch helps as long as you treat it as a question. Counter Culture’s guide says most pour-overs land in the three-to-four-minute range, that “a two-minute brew time” means the grind should go finer, and that “a five-minute brew time” probably means coarser. That range is a roaster’s starting point for a single cup, not a standard for every dose and every coffee.
A dense, light, washed coffee can run five or six minutes and still taste clean and sweet, by The Basic Barista’s account, so for that bag three to four minutes is simply the wrong target. The time only means something next to the taste.
The Basic Barista suggests one to two clicks finer for a sour cup. One is the better first move, at least on a grinder with coarse steps: if the next cup comes out sweeter and rounder, with the sharp edge gone, you are there. If it swings to a dry, bitter finish, the step overshot, and the setting you want sits between the two.
Slow, muddy and bitter: one step coarser
Now the other direction. A cup that tastes bitter, heavy or drying, from a bed that took its time, means the cup is over-extracted: the water stayed too long in grounds that gave up too much. The Basic Barista’s range is one to three clicks coarser, with no big jumps unless the brew has stalled outright. The method boils down to a rule of thumb: too acid, go finer; too bitter or astringent, go coarser. The part most people skip is to change one variable at a time and take notes.
After one step coarser, the next cup should taste clearer and sweeter, with the dry grip at the back of the tongue gone. If it comes out thin and sharp instead, you went past the middle and the step back is a small one. So the two directions meet: fast and sour goes finer, slow and bitter goes coarser, and a cup that tastes clean and sweet is the one to leave alone.
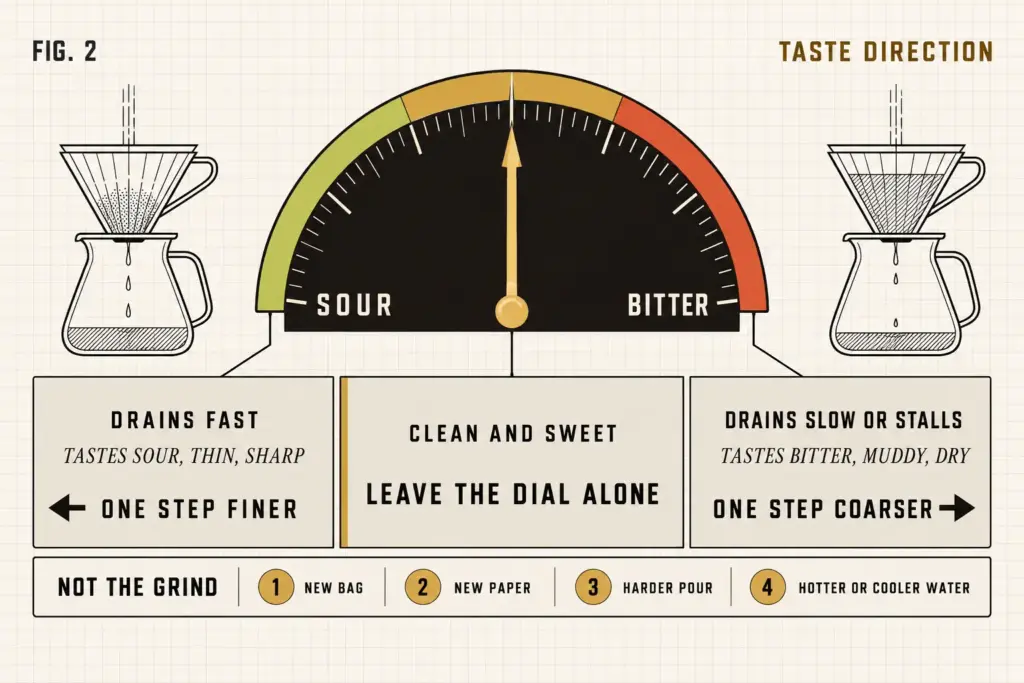
The cheapest experiment in all of this is three cups, one step apart in grind, with everything else fixed. It costs about 60 g of beans and settles more than a week of guessing.
Stalled is not the same as slow
A long drawdown is not automatically a problem. The Basic Barista separates two cases that look alike on a timer. A naturally slow bed keeps draining at a steady rate, the slurry drops between pours, and the cup tastes clean even at five or six minutes.
A stalled bed (a choke, in common shorthand) pools water on top, slows sharply near the end or clogs the paper against the dripper wall, and the cup tastes muddy, bitter or dry. For that one, coarser is the first fix.
Grinding too fine can seal the bed, so the water stops pulling through. You can usually watch it happen. The water line stops dropping while the paper above the bed has already gone dry, and when the last of it finally drains, a gray film of fines sits on top of a flat bed.
Read two numbers off the stopwatch, not one. Note the time when your last pour ends, then the time when the water disappears from the surface of the bed. The first number is mostly your pouring; the gap between the two is the grind and the paper talking. When you move the dial one step, the gap is the number that should change.
When it is not the grind at all
Before you touch the dial, check what else changed. The Basic Barista lists the usual suspects: a new bag of a different origin, roast or process; a different box of paper; a harder or higher pour; a change in water temperature. Any one of them moves the drawdown with the grinder untouched. The small routine counts as well: rinse the filter and preheat the dripper the same way every morning, so a dry paper or a cold cone is never the thing that changed.
Temperature is a lever of its own. Counter Culture brews with freshly boiled water to stay in the range of 195 to 205°F (about 91 to 96°C), and lowers it only for dark roasts or very floral coffees. Hotter water extracts faster and can pass for a grind that is too fine, so a kettle that has sat off the base for a while changes the cup without the grinder doing anything.
And if the drawdown jumps around from cup to cup at the same setting, look at the pour before the grinder. Fix the brew time with the pour technique first and adjust the grind to taste after that. Keeping the water level lower in the cone also slows a brew that runs too fast. A steady pour turns the drawdown back into a reading of the grind.
More Coffee, Deeper Bed: Why Two Cups Drain Slower
Everything above assumes one thing stays still: the dose. The drawdown only means something at a fixed amount of coffee, and the day you brew two cups instead of one, the setting that worked stops being the same setting.
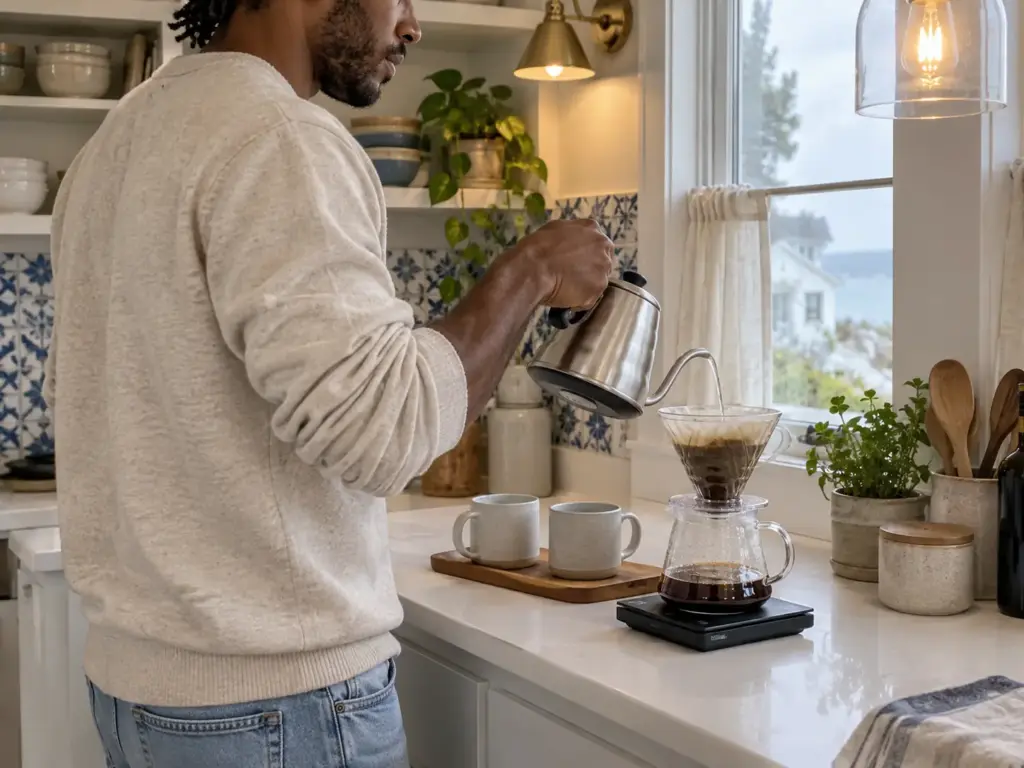
How much coffee for a 12 oz pour over
This part is arithmetic, not a rule from a source. Twelve fluid ounces of water weighs about 355 g, and from there the dose depends on the ratio you brew at:
- At the Golden Cup ratio of about 55 g of coffee per liter (roughly 1:18): about 19.5 g
- At 1:17, Counter Culture’s starting point for the V60 and the Kalita Wave: about 21 g
- At 1:16: about 22 g
In spoons, two tablespoons of beans is about 10 g, and doubling the water to 12 oz doubles the beans to roughly four level tablespoons. The ratio is its own decision. Pick one in that range, keep it fixed while you dial in, and let the grind do the adjusting.
What changes when you brew two cups at once
Double the dose in the same dripper and the bed gets deeper. The water has more coffee to get through, the last third of it takes longer than the first two thirds did, and the whole brew stretches. Scaling a V60 batch up can lengthen the drawdown a lot, even when nothing else changes. Cups were very bitter.”
The reply that helped: “Basically it’s a new dial in process to find a new setting for larger brew.” Its suggestions were a slightly coarser grind, fewer pours and slightly cooler water. Those are three changes, so make them one at a time, grind first, because the deeper bed is the cause and a coarser grind answers it directly.
A bigger batch usually wants a step coarser, because the bed is deeper and the water has further to pull through.
The bottom of a V60 is hard to extract well at larger batches, which is why flat-bottom drippers are often used for them. The V60 is the dripper most people reach for, and for a single cup it earns that. For two cups and up, a flat bed is the better call, because it spreads the extra coffee wide instead of stacking it deep in a cone. If the flat bed you have in mind is the Wave 185, check that your batch fits in it first, given the reviewers who call it small.
The same logic runs in reverse. A grind that clogs at larger cup sizes can often be fixed with more beans and a coarser setting. Dose, bed depth and grind move together, so when one of them changes, expect to move another.
Scoops, tablespoons and why a scale settles it
A tablespoon of beans is a fair first guess. A tablespoon of grounds is not, because the same spoon holds a different weight depending on the grind and the roast. That matters here more than anywhere, since the whole method rests on changing one thing at a time, and a scoop that drifts changes the dose without telling you.
The free version is any kitchen scale you already own plus the stopwatch on your phone; a fairly cheap kitchen scale is good enough for a consistent dose. The Hario Drip Scale Timer puts both on one display: it reads in 0.1 g steps, runs a timer while you pour, and skips its five-minute auto-off while the timer is running, so a slow two-cup brew does not blank out halfway.
Its weak spots are on record. It can break within six months, it is slow to respond when beans pour in quickly, which makes it easy to overshoot a dose, and it lags a few seconds when you switch it on. Pour the last gram slowly, and turn it on before you grind.
Your Grinder’s Numbers Are Its Own
Everything so far has been in words and steps, never in dial numbers, and that is on purpose. The number on one grinder does not mean the same thing on the next one, or even on another copy of the same model.
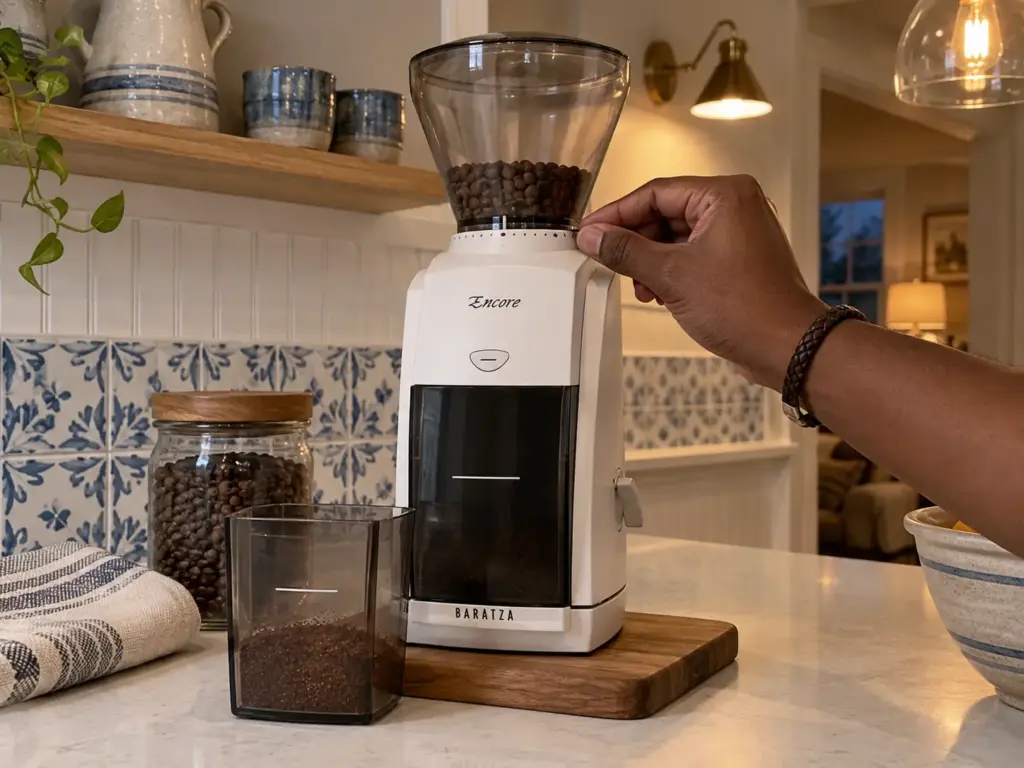
Why one grinder’s 14 is another grinder’s 20
Grinder settings move different distances per click from one machine to the next, and The Basic Barista says it directly: “One click on one grinder may equal two or three clicks on another grinder.” Even the same model does not agree with itself.
The Baratza Encore, with 40 mm conical steel burrs and 40 settings, is the grinder most people name first, and its numbers do not carry over to other grinders. The same setting can behave differently from one grinder to another, since two machines may be calibrated differently. Burr alignment and the zero point vary from unit to unit, so an Encore number is a rough address at best. What your own machine’s number should be is the subject of what number your grinder should be on.
Newer grinders do the same. Settings from one grinder rarely match another’s, even for the same grounds. A hand grinder has one advantage here: you count clicks from a fixed zero, which makes your own numbers repeatable. Finding zero on a hand grinder takes a minute and only has to be done once.
After you move the dial, the first grams out of an electric grinder are partly the old setting, because grounds sit in the chute until new ones push them out. Grind a few grams and throw them away, or judge the new setting on the second cup instead of the first. Skip that and a one-step test turns into a half-step test, and you will read it wrong.
Fines, boulders and the muddy cup
No grinder makes one size. Every setting produces a spread (a grind size distribution, to give it its name), with fines (the dust) at one end and boulders (the chunks) at the other. In a pour-over the fines extract fast and then travel: they migrate down through the bed toward the bottom and the paper, slow the drawdown, and on a V60 they can stall the brew outright. The boulders do the opposite and under-extract, which reads as thin and hollow.
An uneven, wide spread gives you both at once, a cup that is sour and bitter in the same sip. No step on the dial fixes that, because a finer setting adds fines and a coarser one adds boulders; the shape of the spread moves with the dial but does not narrow. Burr geometry is one of the things that decides how wide it runs, which is the real trade-off between conical or flat burrs. The Basic Barista adds one cause that has nothing to do with the grinder at all: “Very fresh coffee producing extra fines.”
What a blade grinder does to a pour-over
A blade grinder is the far end of that spread. A consistent medium or coarse grind needs a burr grinder. The spinning blade chops whatever it hits, so a single pulse makes dust and chunks together, which is why a blade grinder makes a cup sour and bitter at once.
Before buying anything, try the free version. Grind in short pulses, shake the grinder between them so the big pieces fall back onto the blade, and stop when most of the pile looks like coarse sand. Then brew and read the drawdown. But if it still stalls and the cup still tastes sour and bitter together, the spread is the problem rather than the setting, and the next decision is a grinder that holds a pour-over setting evenly.
The New Bag and the Setting That Stops Working
The setting you finally land on belongs to the bag you found it with. The day that bag runs out and a new one goes in at yesterday’s setting, the drawdown can run a minute slower with the dial untouched, and the only thing that changed was the coffee.
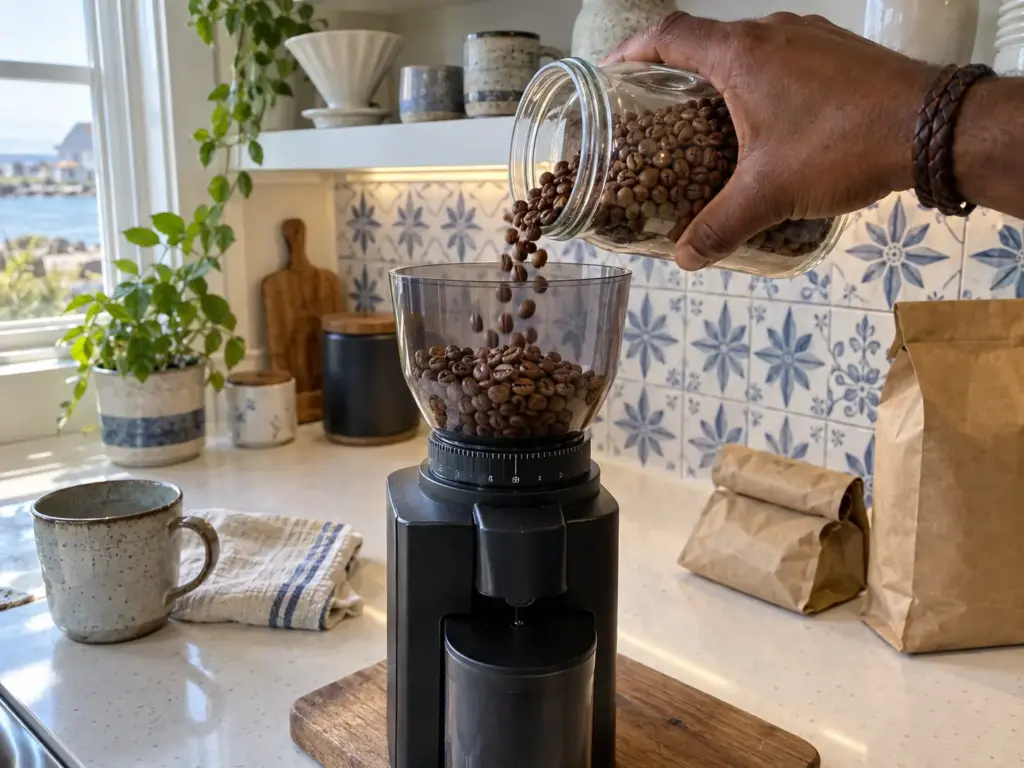
Light, dark, washed and natural
Roast changes the bean you are grinding. The Basic Barista notes that light roasts are denser and usually want a slightly finer grind, while dark roasts are more brittle and tend to do better a little coarser; the longer explanation is why light roasts grind finer.
Processing moves it too. Natural-process beans often want a coarser grind than washed ones, so a new bag may need its own setting. If you are still choosing beans for your dripper, which roast suits a pour-over is the other half of that decision.
Brew the new bag twice before you touch the dial
Start the new bag at your old setting and brew it once or twice before you change anything, as The Basic Barista suggests. Fresh coffee is still releasing gas, and the first cups from a new bag can drain differently from the ones a week later. The routine is to set a base grind when a new bag goes in, adjust from there, and expect two or three brews to land it.
Then keep the setting with the bag. A note on the bag itself or in your phone with the roast, the process, the setting and the drawdown time costs nothing, and the next bag from the same roaster starts from a real number instead of a guess. The Basic Barista adds that many experienced brewers nudge the setting slightly through a bag as it ages and degasses, so the note is a starting point, not a verdict.
Write the setting and the drawdown time on the bag with a marker the day you land them. When the bag is half gone, brew once at that setting and time it again. If the drawdown has moved and the cup tastes different, the coffee has changed, not your grinder, and one step in the direction the cup points is all it needs.
When the old setting drifts for no reason
Sometimes nothing changed: same bag, same paper, same pour, same dose, and over a few weeks the drawdown runs faster and the cup thinner. When that happens with a bag you know, look at the grinder before the beans. Burrs that have dulled crush more than they cut, which widens the spread and changes what a number on the dial produces; the signs your burrs are worn covers what to check.
The end of a bag can fool you in a smaller way. The last scoops come from the bottom, with more chaff and small broken pieces, and the last brews of a bag can drain a little differently from the first ones, so judge the grinder on a fresh bag before you blame it.
Time Tomorrow’s Drawdown, Then Move One Step
Three things carry this whole page. The pour-over grind is a band, medium to medium-coarse, and your dripper and its paper place you in it, with the Chemex at the coarse end. The drawdown and the cup pick the notch: fast and sour goes one step finer, stalling and bitter goes one step coarser, one change and one taste at a time. And the setting belongs to the dose, the paper and the bag as much as to the grinder, so when any of them changes, expect to move a step.
A month from now, with the same bag or the next one, brew at the setting you wrote down and compare the drawdown; if it has crept faster and the cup has gone thinner, check the burrs before you blame the beans.
Tomorrow, brew at the setting you already have, time the drawdown, taste, and move one step in the direction the cup points. Then taste again with everything else left exactly where it was: the next cup should be sweeter, and if it tips the other way, you have found the two settings your notch sits between.
Frequently Asked Questions
01What grind is best for pour over coffee?
Medium to medium-coarse, about the feel of coarse sand, adjusted for the dripper: coarsest for a Chemex, a little finer for a V60 or a Kalita Wave. From there, the drawdown and the taste decide the exact step.
02What is the 15-15-15 coffee rule?
A freshness rule, not a grind rule: green beans within 15 months of harvest, roasted beans within 15 days of roasting, ground coffee within 15 minutes of grinding. Tasting Table describes it, and the SCA cupping protocol also evaluates grounds within 15 minutes. More on the timing in when to grind.
03How much coffee for a 12 oz pour over?
About 20 to 22 grams of coffee for 12 ounces of water, roughly 355 grams, which is around four level tablespoons of whole beans. Weigh it once, since a tablespoon of grounds changes with the grind and the roast.
04Is pour over grind the same as drip grind?
They share the medium range, so a drip machine setting is a fair place to start a cone or a V60 before the drawdown and the cup take over. From there the dripper moves it: a Chemex goes coarser, and a V60 lands a step either side.
05How long should a pour over take?
Most single cups finish draining in about three to four minutes, but treat that time as a guide to check against the taste rather than a target. A bigger dose or a dense light roast can run longer and still taste clean; a bed that pools and tastes muddy has stalled, so go coarser.


How did your cup turn out?
No comments yet. Tell us what you changed — and whether the needle moved.