
We may earn a commission when you buy through links on this page. It never changes what we recommend. How we pick
On this page8 parts
- The Coffee Grind Size for a Percolator Is Coarse
- Why a Percolator Wants the Coarsest Grind on the Chart
- Read the Pot, Then Move One Step
- The Grinder, and Why Its Coarse End Matters Here
- If All You Have Is Pre-Ground Coffee
- When It Isn't the Grind at All
- Coarse Is the Start, the Last Cup Is the Judge
- Frequently Asked Questions
The pot perks, the kitchen smells the way it should, and the last inch of your cup is a mouthful of grounds. Or the pot pours out pale and tastes like hot water that walked past some coffee on its way to the mug. Those two pots are off in opposite directions, and both trace back to one question: what coffee grind size for a percolator should you have started with?
A percolator is the one brewer on the grind chart that sends water, close to a boil, up a tube and back down through the same grounds again and again, and it holds those grounds in a basket full of holes, so the grind has two jobs at once: slow the extraction down and stay in the basket. What follows is the texture to start at, why this pot wants the coarsest grind of any brewer, how to read the pot and move one step at a time, what your grinder’s coarse end and a can of pre-ground change, and what to check when the grind was never the problem.
Quick Answer
Coarse: chunky grounds the size of coarse sea salt, the French press setting or one step past it. Near-boiling water cycles through the same grounds, so finer grounds over-extract and slip through the basket holes. Grit, mud or bitterness: one step coarser. Thin and pale: weigh the dose, then one step finer, never past what the basket holds.
The Coffee Grind Size for a Percolator Is Coarse
Start coarse: chunky, separate grounds about the size of coarse sea salt, which on most grinders means the French press setting or one step past it. Percolator advice doesn’t agree on the word, though, and each version comes with a reason that says something about your own pot.
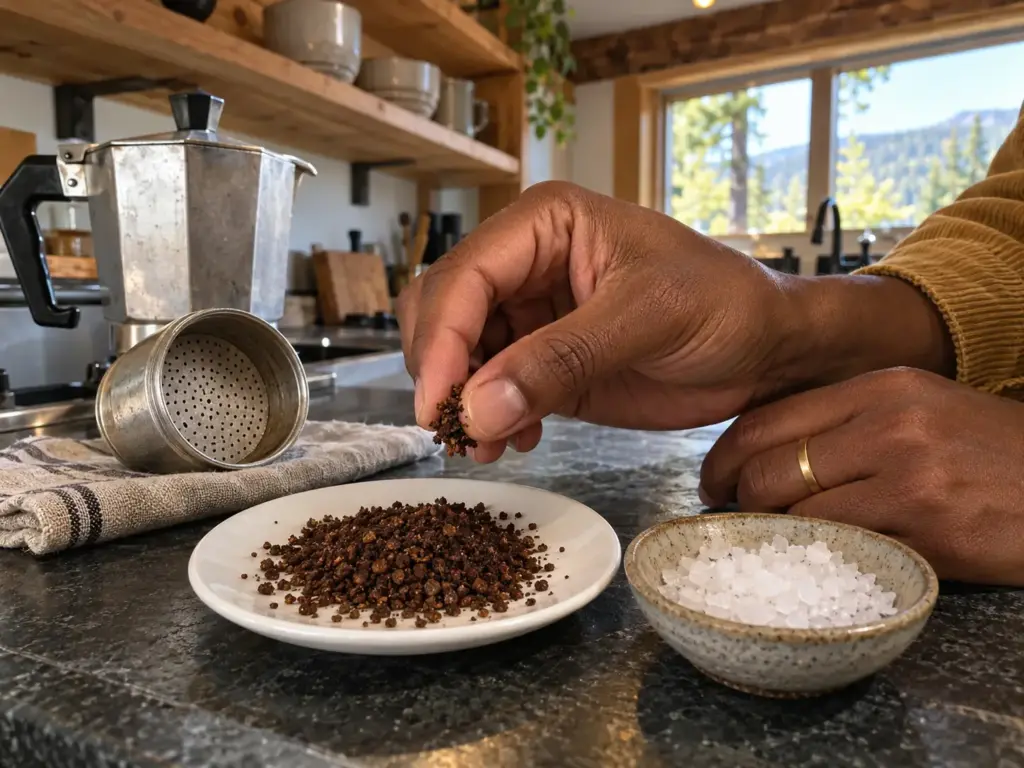
What Coarse Looks Like Next to Salt
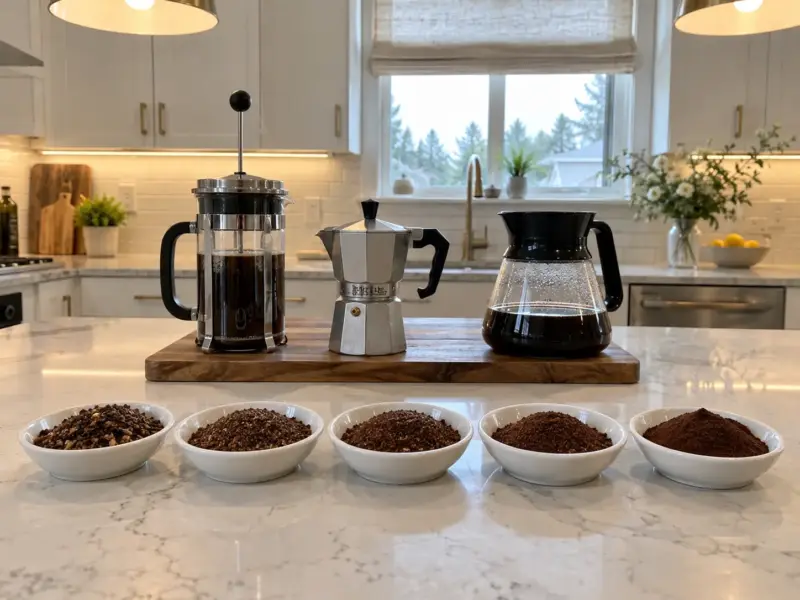
Pinch some grounds and roll them between two fingers. At the right size you can see each particle on its own, and they fall apart instead of clumping or leaving a film on your skin. The National Coffee Association compares its coarse grind to rock salt and its medium grind to kosher salt, and a drip machine’s grind feels like beach sand next to either one. A percolator wants the chunky end of that salt shelf, which is where COLETTI, a camping-gear maker that sells percolators, puts it: “coarse sea salt”.
Look at the bottom of the bag or the grinder’s catch cup, too. Even a good coarse grind leaves a little fine brown dust clinging to the plastic, and that dust is the part of the dose your basket won’t hold. A pinch that looks right on top can still carry enough of it to leave sediment at the bottom of the pot.
Why Some Sources Say Medium-Coarse
The disagreement is real, and it splits three ways. COLETTI is flat about it: “Coarse grind is the only grind size that works consistently in a percolator.” Trade, a coffee subscription company, writes that “Most percolators will call for a medium-coarse grind size”, slightly finer than a French press. The usual answer for percolators is a medium-coarse grind or a regular drip grind with a filter.
Read side by side, they contradict each other less than they seem to. Coarse is the version that needs nothing else in the basket. Medium-coarse shows up when a paper disc is catching the fines, or when a grinder’s coarsest setting is so uneven that the pot comes out thin; both cases come back further down.
No standard settles it, either. The National Coffee Association’s grind guide gives grinds for French press, drip, pour-over, espresso and cold brew and has no percolator row at all, and the Specialty Coffee Association publishes no percolator grind and certifies no percolator. The start is a texture; the pot decides the rest.
The confusion shows up at real counters. A common assumption is that today’s coffee is simply ground too fine. The first reply didn’t argue: “Drip is way to fine for perking.”
Where the Percolator Sits on the Grind Chart
On the full grind size chart, the percolator belongs at the coarse end, right beside the coarse grind a French press uses, and the right percolator grind setting can sit a step past it. The rest of the chart doesn’t matter much here; the press is the only neighbor that teaches you anything about this pot. Both brewers keep grounds and water together for minutes, and both hold the grounds back with a metal filter: a press with a mesh screen, a percolator with a perforated basket. The difference is what happens to the water, and that difference is why a percolator can go a notch coarser than a press without the pot coming out thin.
Why a Percolator Wants the Coarsest Grind on the Chart
Coarse sounds like folklore until you watch what the pot does with the water. Every other brewer on the chart passes water through the coffee once or lets it sit; a percolator keeps passing it, and keeps heating it while it does.
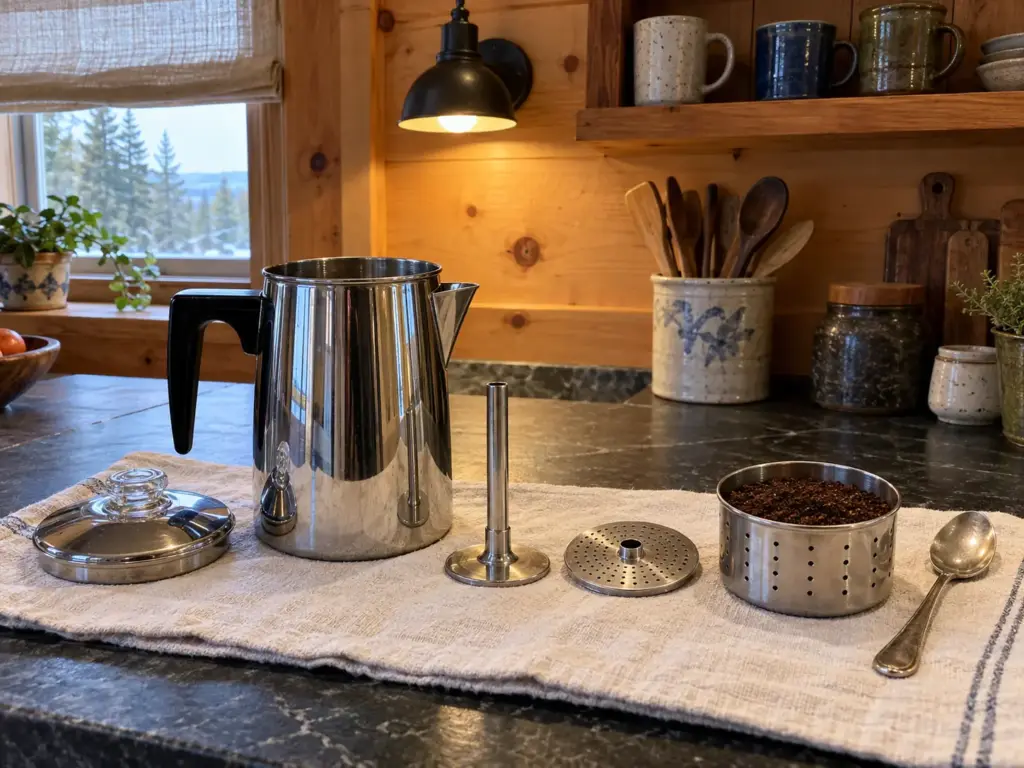
The Same Water, Through the Same Grounds, Again
Watch the glass knob on the lid while the pot works. What bubbles up there isn’t fresh water: it’s coffee, already brewed, on its way back down through the grounds for another pass. Presto describes its own pot in exactly those terms: “Coffee percolates through the grounds multiple times.” The brew time on the clock is a few minutes, but the grounds see the water over and over, so the pot behaves like a long-contact brewer, and the NCA’s rule for those is plain: “the longer the coffee is in contact with water during the brewing process, the coarser the grind should be.”
The grind is the lever on how fast that extraction runs. According to the Specialty Coffee Association’s brewing research, “TDS and PE can both be increased by using a more finely ground coffee.” TDS is the strength of the brew, and PE is the share of the coffee the water managed to dissolve. Put fine grounds in a pot that washes them again and again and both numbers climb past the point where the cup tastes good: harsh, bitter and astringent, dry at the back of the tongue.
The other stovetop pot, the moka pot, works the opposite way: it pushes water up through its grounds once, on steam, and wants a finer grind because it only gets that one pass.
A Pot That Ends Near a Boil
Heat is the other accelerator. Water boils at 212°F at sea level, lower as you climb: 212°F (100°C) at the coast and 202.9°F (94.9°C) at 5,000 feet, by the U.S. Geological Survey’s figures. The NCA gives brewing water as 93 ± 3°C, roughly 195–205°F (90–96°C).
A stovetop percolator left on the burner keeps climbing toward the boil, so it brews at the top of that band or past it. At altitude it physically can’t pass about 203°F (95°C), which puts a mountain camp pot back inside the band.
Now the caution, because this is where the boil gets blamed for more than it does. The same SCA feature says there is little hard evidence behind any single ideal temperature range, and the UC Davis work it reports found that, with strength and extraction held fixed, brew temperature changed the taste of drip coffee very little. So boiling doesn’t ruin coffee on its own. What it does is speed extraction up, and in a pot that also repeats the pass, something has to slow it back down.
That something is the grind.
The Basket Holes Set the Floor
A drip machine holds its grounds in paper. A percolator holds them in a metal basket punched with holes, and those holes set a floor that no taste preference can argue with. Trade’s advice is to grind “not so fine that particles will fall through the perforated filter screen,” and a grind below that line ends up in the pot as mud, however it tastes. A cheap aluminum camp pot can make muddy coffee when its filter basket has giant holes.
The holes aren’t the same size from pot to pot, which means the same grind can pour clean from one percolator and cloudy from another. One Presto owner who couldn’t explain “inconsistent results even with store bought ground coffee” ended up blaming the basket itself and asked the maker to “re-design the basket with larger perforations.” Treat the basket as part of the setting: move the same coffee to a different pot, and the grind that worked may not carry over.
Before you brew with a new grind or a new pot, put a spoonful of the dry grounds in the empty basket and shake it over a white plate for a few seconds. Whatever lands on the plate is what would have ended up in your cup. More than a light dusting means one step coarser, before you spend a whole pot finding out.
Read the Pot, Then Move One Step
With the basket setting a floor and the boil speeding everything up, the pot itself tells you which way it’s off. It can only tell you if the dose stays the same from one pot to the next, though, so the dose gets settled before anyone touches the dial.
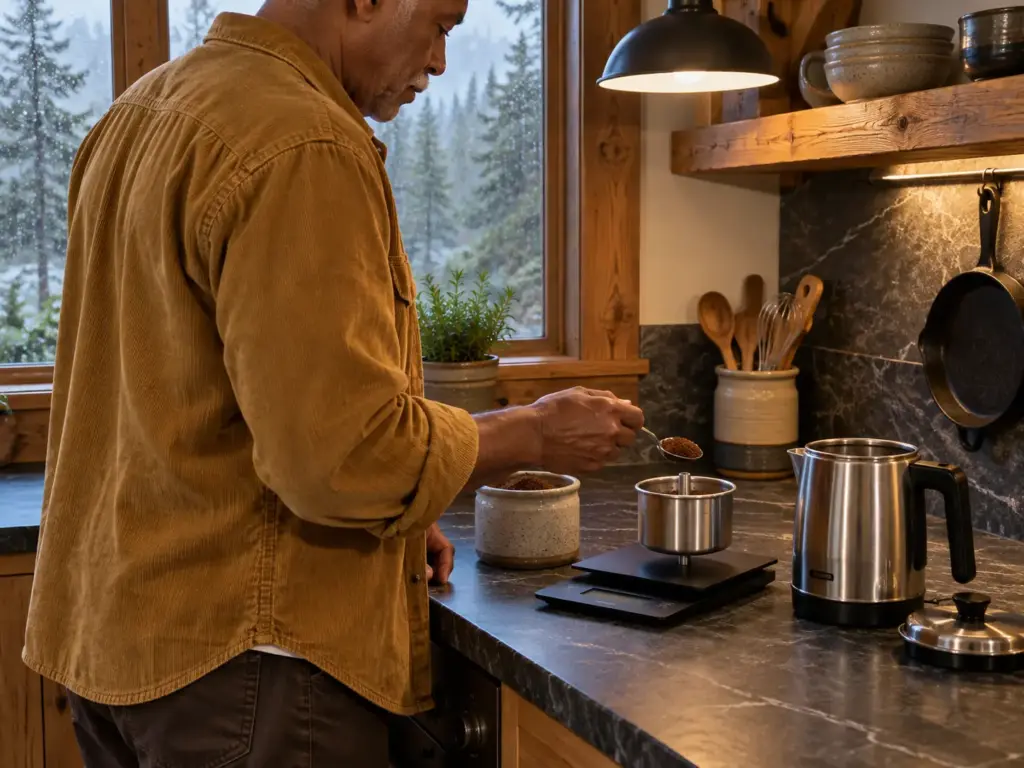
Grit, Mud or Bitter Means One Step Coarser
The pot gives you two signals, and they point in opposite directions. Grounds in the cup, a cloudy pour or a harsh, bitter pot mean the grind is too fine for this pot: go one step coarser.
A thin, pale, watery pot, sometimes with a sour edge, means under-extraction, the water didn’t pull enough out: check the dose and the water line first, then go one step finer, and never finer than the basket holds.
The rule fits in two lines: too weak or acidic means go finer, and too bitter means go coarser. The SCA’s own measurements sit behind the sour half of it, since sourness ran highest in the cups with the lowest extraction.
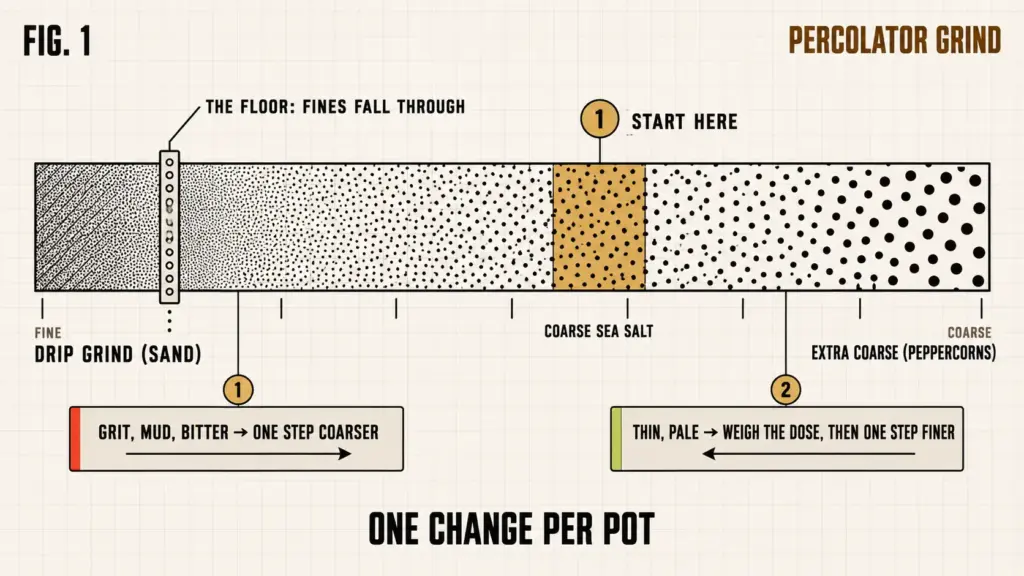
Then brew the next pot and check what moved. One step coarser, done right, gives a last cup with no grit on the bottom and a bitterness that backs off. Overshoot, and the pot turns thin with a sharp edge; come back half a step if your grinder has one.
One step finer, done right, gives a pot that tastes like coffee all the way to the finish, and overshooting it brings the grit and the harsh edge straight back.
Judge from the last cup, not the first. The first pour comes off the top of the pot and can look perfectly clean, because the fines sink; the last inch of the last cup is where grit shows up first, and it’s the honest reading of the grind.
Thin and Pale Means Check the Dose Before the Dial
A thin pot tempts you to grind finer, and in a drip machine that’s usually right: it’s the same sour-means-finer rule a drip machine follows. In a percolator, the dose often gets there first.
The Presto 02822 6-Cup Electric Percolator, the stainless pot behind most of the dose numbers owners trade, counts a cup as about 5 ounces of brewed coffee, so its six cups add up to roughly 30 fluid ounces, not six mugs. It does not please everyone: it can fall short of its six cups, and it can stop working well early on. Read it here as the pot that explains the numbers, not as a reason to replace yours.
The label convention of two tablespoons per 5-ounce cup would put twelve tablespoons in that basket. It won’t take them. On a Presto percolator, a small change in coffee can take the pot from too weak to fine to overflowing, so the amount matters as much as the grind. So the basket, not the brew ratio, caps the dose, and once you’ve hit that cap the grind is the only thing left to do the strength work.
So a thin pot means one step finer. Or rather, first look at the water. On a Presto, if the water is not leveled right at the 6 line, the coffee can come out extremely weak. A pot filled a little past its line brews weaker than one filled to it, and in the cup that’s indistinguishable from a grind that’s too coarse.
Weigh It Once, Then Change Only the Grind
A dial number means little on its own. Dialing in two good hand grinders on a Presto or a vintage Pyrex stovetop pot can still leave the results swinging from very good to mediocre, and the tablespoon is the first place to look.
A tablespoon of coarse grounds holds a different weight every time, because chunky particles pack loosely and settle differently in the spoon, so the “same” dose moves from pot to pot and drags the taste with it. Those two dial ranges also show why one grinder’s number means nothing on another.
It costs nothing if there’s a kitchen scale in a drawer: weigh your usual seven tablespoons once, weigh the water, write both numbers down, and from then on only the grind moves. The first weighed pot is your datum, the reference point for every change after it. If you don’t own a scale, the Hario Drip Scale Timer reads in 0.1-gram steps and has a timer built in, more precision than a percolator strictly needs, but it makes the datum easy to repeat. Do not count on it lasting forever: it can break within six months, and it can keep shutting off midway through a brew.
The opposite mistake is worth watching for too. Coffee that comes out way too strong, full of grinds, and cloudy often gets fixed by a coarser grind and a filter, and the result can be a great pot. Good result, but there’s no way to know which of the two changes did it, and the next time the pot drifts there’s no way to know which one to undo.
Change one, brew, taste, then the other. How much coffee per cup and how long to let the pot perk are questions for a percolator’s own guide; here, the only thing moving is the grind.
Once you’ve weighed your dose, write the gram number and the grinder setting on a strip of masking tape stuck to the coffee canister. The scale does its job once; the tape does it every day after, including the days you’re too sleepy to remember what you changed last time.
The Grinder, and Why Its Coarse End Matters Here
“One step coarser” assumes your grinder has clean, even steps at the coarse end. That end is where most grinders are least even, and a percolator exposes it twice: through the basket holes and through the repeated passes.
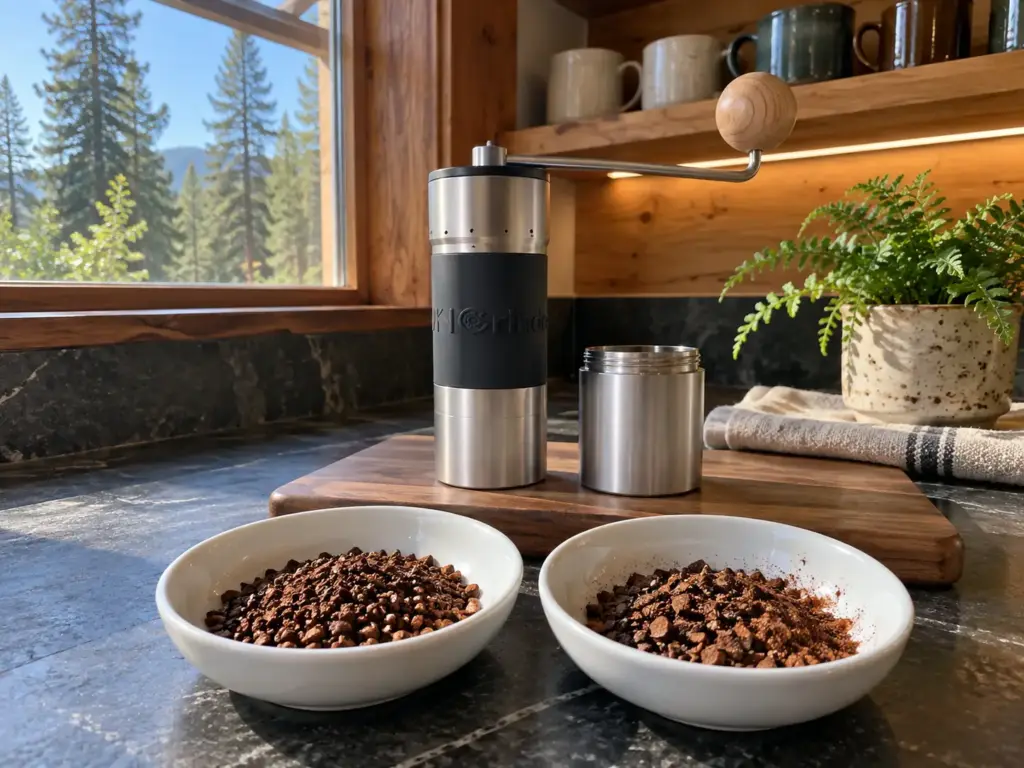
Why a Blade Grinder Is the Worst Match for a Basket With Holes
A blade grinder doesn’t grind to a size. It chops for as long as you hold the button and leaves boulders and dust in the same batch, and in a percolator both halves go wrong at once. The dust goes straight through the basket holes into the pot, while the boulders barely extract, so the pot comes out muddy and thin together, a combination that tempts people to move the wrong way.
That split is why a blade grinder makes a cup sour and bitter at once, and the NCA says as much: with a blade, you can’t count on grind consistency, and the taste follows. Even COLETTI, which answers “coarse” to nearly everything else, allows that “Blade grinders can work, but they are less consistent.”
If a blade is what you own, grind in short pulses, shake the grinder between them, and stop while the pieces still look chunky. A paper disc in the basket, covered further down, catches the dust the pulses still make.
The Coarse End of a Cheap Burr Grinder
COLETTI’s instruction for a burr grinder is to set it to the coarsest setting available. On a good grinder that works. On a cheap one, the coarsest setting is often the least even part of the range: the burrs sit far apart, the beans crack into uneven chunks, and the pot comes out thin while the dust still clouds it.
On a cheap burr grinder I’d start one or two steps in from the coarsest stop and let the pot decide, not the number on the dial.
Coarse carries a cost of its own, too. It’s the safe direction for grit and bitterness, but every step coarser also leaves a thinner pot, and on an uneven grinder you pay that cost without getting the clean cup in return. So start with the grinder already on your counter, one step per pot, with the dose weighed. A new grinder earns its place only when the coarse end can’t hold a setting you can repeat.
The Baratza Encore is the usual first step up: 40 mm conical steel burrs and 40 settings, so one step is a small move rather than a jump. Its reviews carry two warnings, one reviewer each and not a measurement. The grinder is very consistent the finer it goes, then trails off at the larger French press sizes, and some units have died within months.
Grinders also change with use in ways the first week never shows: oil and fines pack into the burrs and the chute over the months. For less money, the OXO Brew Conical Burr grinder gives you stainless conical burrs and 15 main settings without a hand crank. Reliability is its weak spot: roughly four in ten of the owners who bring it up are unhappy, and one found it had “stopped working because it needed to be cleaned,” which is that packed-in residue doing its work. If your own grinder’s coarse end won’t hold a setting, the next thing to read is how to pick a cheap grinder that stays even at the coarse end.
A Hand Grinder With Small Steps
Step size matters more at the coarse end than it looks. On a grinder with big jumps between settings, one click can carry the pot from gritty straight to thin and skip the setting you wanted. A stepless hand grinder, or one with small steps, turns “one step per pot” into a small, repeatable move.
The KINGrinder K6 has a conical steel burr with 16-micron steps, per its listing, and needs no outlet, which also suits a camping percolator. Durability is where it slips: of the 45 buyers who mention durability, 24 aren’t happy, and one warns that the wooden knob can come off. (You’ll also be cranking a full percolator dose by hand, which for a 6-cup pot is a real workout.)
Every grinder keeps some grounds inside after it runs. After you move the setting, grind a few grams and toss them before you dose the pot; otherwise the first part of your dose comes out at the old setting, and your one-step change lands in the basket as half a step.
If All You Have Is Pre-Ground Coffee
Most percolators in American kitchens run on a can, and the can is ground for a drip machine, finer than this pot wants. That can be made to work. It can’t be made coarser.
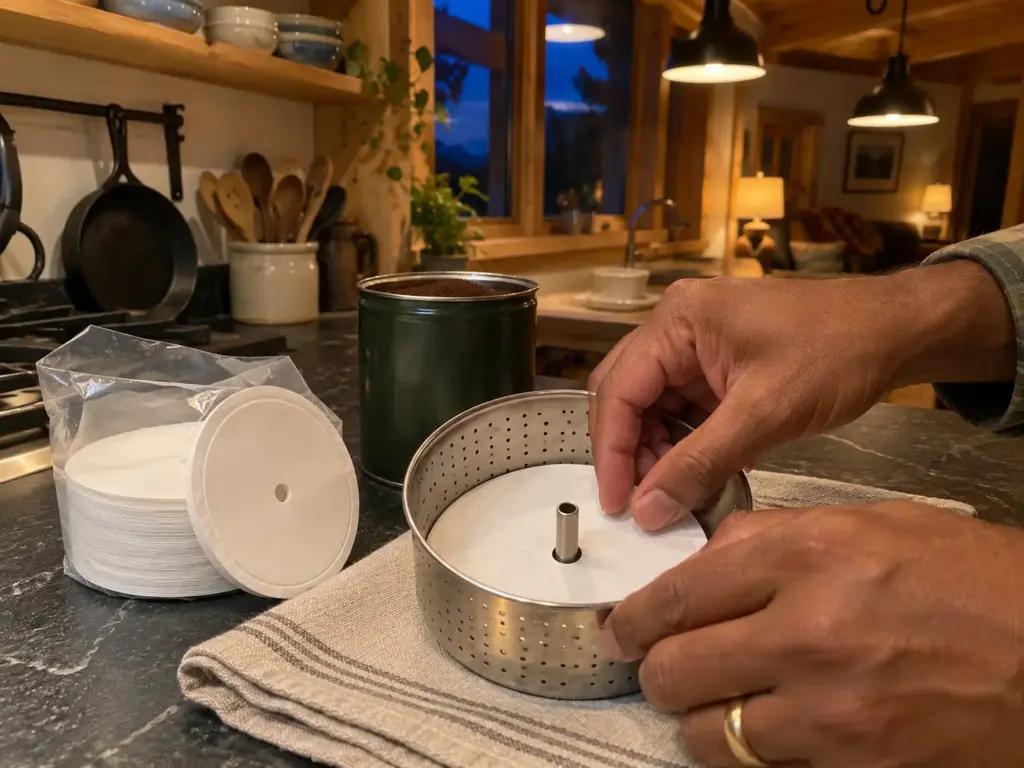
Why a Can of Regular Grind Muddies the Pot
“Regular” on a can means a drip grind: sand, not sea salt. In a percolator the finest part of it slips through the basket holes and clouds the last cup, and what stays in the basket gets washed again and again close to a boil, which pulls out more bitterness than the same coffee would give up in a drip machine.
Cans aren’t all ground the same, though. A percolator can run on a big supermarket brand with no issues at all. The reply was that this brand is ground a little thicker, and “Some out there is ground to almost a powder and that wont work unless you use a paper filter.”
Both cans say the same word on the label. Only the basket tells them apart.
What a Paper Disc Fixes, and What It Doesn’t
The workaround for a can is a round paper disc under the grounds. Paper disc filters let you use a regular grind. With round paper filters in a stovetop pot, the cup comes out clean, and the longer it percs, the stronger it gets. The paper catches the fines the holes let through, and it slows the water a little on its way down.
Measure your basket before buying any: across the floor, where the disc will sit, not across the rim. The Percolator Disc Coffee Filters, 300 to a pack, are 3.5 inches across with a perforated ring you tear off to fit a 3-inch basket. They aren’t a sure thing. Some paper discs are too thick and can make the grounds overflow the coffee basket, and a disc under the grounds with one on top can still leave grounds all through the pot, so the fit depends entirely on the diameter you just measured.
Seat the disc flat on the basket floor with the stem through its center before the grounds go in; a disc that rides up one side lets fines slip around the edge.
A disc looks like the answer to everything a can does wrong. It answers half. It stops the mud, but the fine grounds sitting on top of it still go through the same repeated passes near a boil, and fine grounds extract faster, as the SCA research above says.
A drip grind on a disc pours clean and still tastes more bitter than a coarse grind would in the same pot. That’s reasoning from the mechanism rather than anything printed on a box of filters, and it’s easy to check: brew the same beans both ways and taste the last cup of each.
Buying It Coarse Instead
Ground coffee can’t be ground back into bigger pieces, so every coarse route starts with whole beans. One way is the store’s own bean grinder set to coarse, since you need a shop that can grind the coffee from beans. The other is whole beans and a grinder at home, with everything the grinder section says about coarse ends.
Pre-ground has a second problem, one that takes weeks to show. Once the can is open, ground coffee goes stale much faster than whole beans, so a pot that slowly turns flat over the life of one can may be the can and not the grind. How fast an open can of ground coffee goes stale is a question of its own, and it decides how big a can is sensible to buy.
At a store grinder with no percolator setting, pick the French press one, and grind a smaller bag than the can you’re replacing. Coarse from the store is still pre-ground, and it goes flat on the same schedule as the can.
When It Isn’t the Grind at All
Some bad pots have nothing to do with the dial. And one kind of bitterness comes with the method itself, which no grind setting removes.
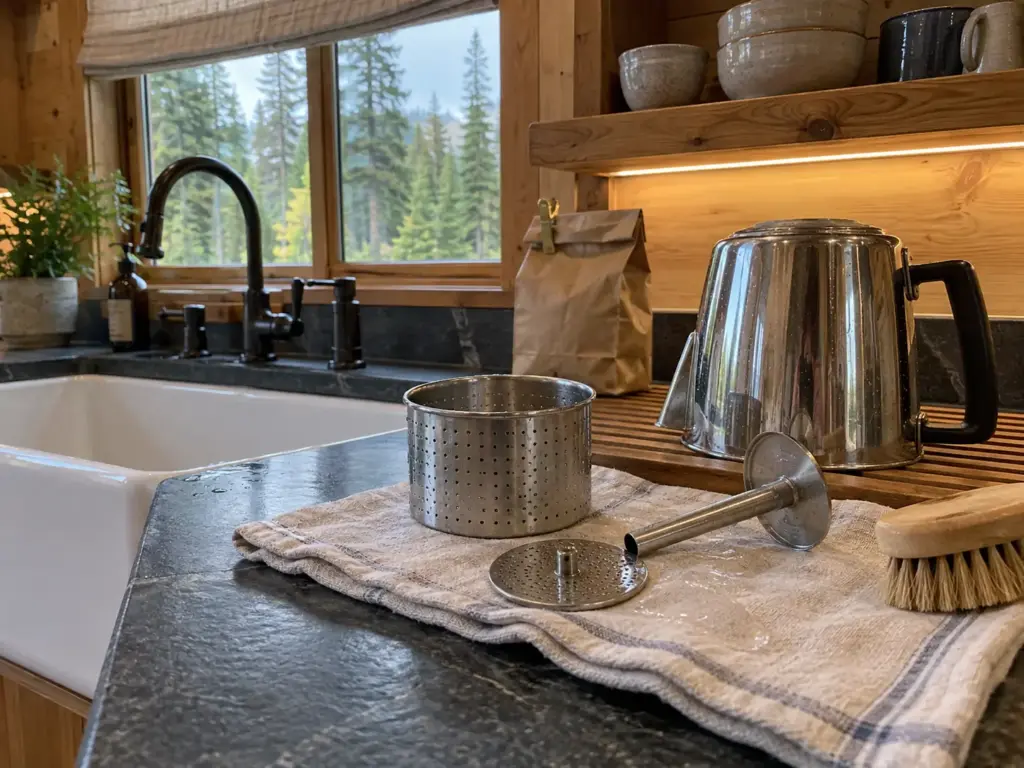
Heat and Perk Time
A pot rolling hard on high heat, or perking for long after it started, over-extracts whatever grind is in the basket. COLETTI’s advice is steady heat that isn’t too high, which on most stovetops means low to medium heat; Trade’s is to take a stovetop pot off the heat as it approaches a steady boil and starts to perk. Electric pots end the perking cycle on their own, and many then hold the coffee warm, which brings a problem of its own. How long and how hot are questions for a percolator’s own guides; what matters here is that no grind change makes up for a burner set too high.
An electric pot on keep-warm goes on cooking the coffee that’s already brewed, so the first cup and the third can taste like two different grinds. If only the late cups are bitter, that’s the warmer talking, not the dial. And sometimes the pot itself is failing: Presto owners describe units that stop perking reliably after months of use, “Usually very weak, sometimes light brown water,” which looks like a grind problem and isn’t one.
An Old Coat of Oil in the Basket
COLETTI, which sells percolator cleaning tablets in the same paragraph, warns that “Coffee oils coat the basket and interior walls and turn rancid over time.” Take the brand’s product out of it and the point about rancid oils still holds. A basket and stem that smell of old coffee pass that stale, bitter edge to the next pot, and turning the grinder won’t move it. Wash the basket, the lid that sits on it and the inside of the stem (a bottle brush fits most stems) before you move the dial again.
Stale Beans, and the Bitterness That Comes With the Boil
The beans come before the grind. A first small pot from a dark roast can come out extremely weak, and old beans, weeks past their roast date, are as likely a suspect as the grind. If a pot tastes flat and hollow at every setting you try, check how to tell if your beans are stale before you move the dial again.
And some bitterness is simply the price of the method. Percolators have a bad reputation because the brewed coffee gets boiled as part of the process. Taste is personal here, and some drinkers find percolated coffee oily, while others do not mind at all.
Both are opinions. What a coarse grind and gentle heat can do is keep the boil’s bitterness in check; nothing makes a percolator taste like a pour-over, and it doesn’t need to.
Coarse Is the Start, the Last Cup Is the Judge
- Start coarse: coarse sea salt, your grinder’s French press setting or one step past it, and a step or two in from the stop on a grinder whose coarse end is uneven.
- Read the pot: grit, mud or bitterness means one step coarser; a thin, pale pot means check the dose and the water line before you go one step finer.
- With a can of regular grind, a paper disc stops the mud but not the extra extraction, so the pot stays more bitter than a coarse grind would make it.
A month from now, look at the bottom of the last cup again: grit at a setting that used to pour clean means the grinder’s coarse end has drifted or the basket needs a wash.
Tomorrow, weigh the dose once, grind it to coarse sea salt, brew, and taste the last cup before you change anything else. If it’s clean and still has some bite, leave every setting where it is and let the next pot confirm it.
Frequently Asked Questions
01What is the best grind size for a percolator?
Coarse, about the size of coarse sea salt, which is the French press setting on most grinders or one step past it. The water passes through the grounds many times near a boil, so finer grounds over-extract and slip through the basket holes.
02Can you use regular grind coffee in a percolator?
Yes, if you put a round paper disc filter in the basket, because regular grind is a drip grind and is finer than the basket holes can hold. Without a disc it muddies the pot. With one, the pot pours clean but still tastes more bitter than a coarse grind.
03Why is there grit in my percolator coffee?
The grind is finer than the basket holes, or your grinder makes dust along with the coarse pieces, and that dust passes straight into the pot. Go one step coarser or add a paper disc, one change at a time, and judge by the last cup.
04Why don’t people use percolators anymore?
Mostly because a percolator boils coffee that has already brewed and sends it back through the grounds, which pulls out more bitterness than drip or pour-over. A coarse grind and gentle heat keep it in check, but the pot still tastes like a percolator.
05Is percolator grind the same as French press grind?
Close: both start at coarse sea salt, and the French press setting on your grinder is the right place to begin for a percolator. A percolator can sit one step coarser, because its water passes through the grounds again and again near a boil, while a press steeps once.

How did your cup turn out?
No comments yet. Tell us what you changed — and whether the needle moved.