


We may earn a commission when you buy through links on this page. It never changes what we recommend. How we pick
On this page8 parts
- Which Parts of a Reusable Pod Touch the Hot Water
- What "Food Grade" and "BPA-Free" on the Label Do and Don't Cover
- The Cup Signs of a Worn Lid or Seal
- Rinse the Reservoir Before You Replace the Pod
- Steel Fixes the Material, Not the Seal
- Grounds in the Cup Come From the Mesh
- Press the Ring Tomorrow, Then Taste
- Frequently Asked Questions
A pod you have used for months starts giving a thin cup, or one with a faint plastic edge, and a headline last week has you typing are plastic reusable coffee pods safe into the search bar. The pod is only one of the plastics the hot water meets on its way to the mug, and the part of it that fails first is rarely the shell. What plastic or a chemical does once it is inside a person is a question for a doctor, and the pod’s spec sheet is what to bring to that conversation. The cup is what this page can settle, so it goes through the parts that touch the water, what a label covers, the lid and the seal, the machine’s own reservoir, what steel fixes and what it leaves alone, and the mesh.
Quick Answer
For the cup, a plastic reusable pod changes your coffee only where a part has worn or cracked, so the check is the lid and the silicone ring around it. Press the ring into its groove, close the lid square, brew the same fill and taste. If the cup is still thin, rinse the machine’s tank before replacing the pod.
Which Parts of a Reusable Pod Touch the Hot Water
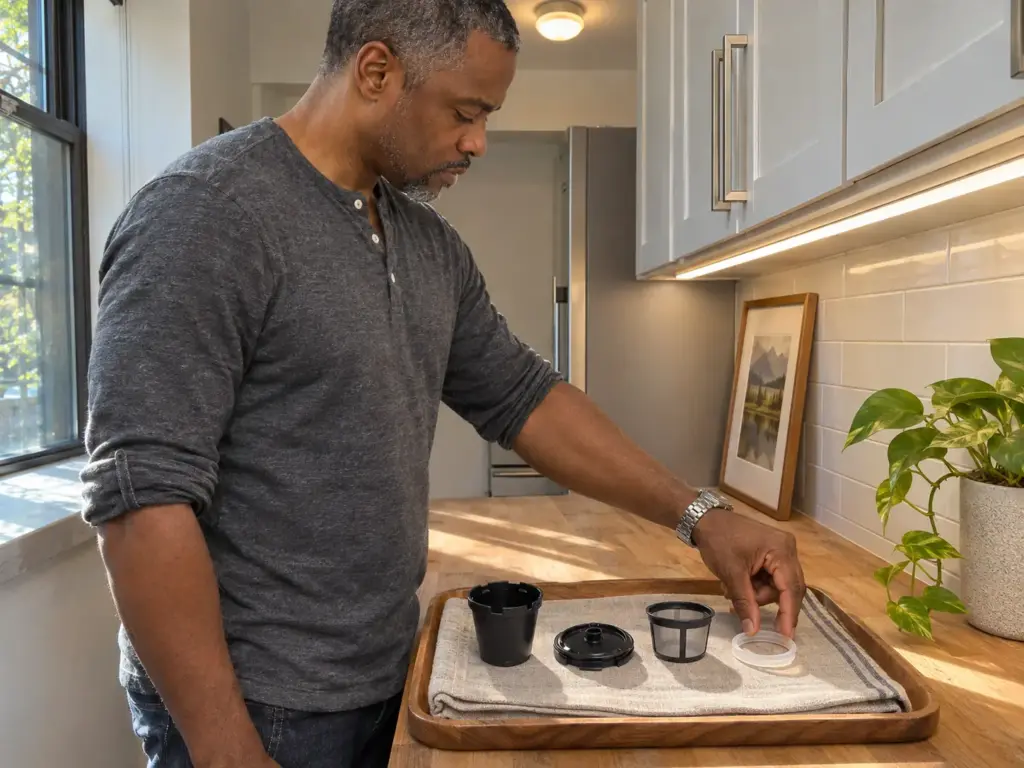
“The plastic” is how the worry gets phrased, but a reusable pod is four separate parts, and only some of them sit in the water. Name the parts first and the list of things to look at gets short.
The shell holds the grounds, the lid and seal hold the water
The shell is the cup-shaped holder for the grounds. Hot water enters through the lid, where the machine’s needle passes through, and the silicone ring around the lid’s edge is what makes the pod close over the grounds instead of letting the water slip past them. That makes the shell mostly a container, while the lid and ring take the heat and every wash.
A pod whose plastic looks perfect can still give a thin cup, because the ring has softened or shifted in its groove and the water has found a route around the coffee. A pod that leaks from one side only has a lid that does not close square, and that is a closing problem that says nothing about the material.
The mesh decides what reaches the cup
The mesh (or filter basket) is the other working part. It holds the grounds back while the coffee passes through. A coarse screen lets fines slip into the mug as silt, and a finer one catches more but clogs sooner.
Mesh wears by clogging rather than cracking: oils and fines pack into the weave, a brew that used to finish in a minute starts to drag, and the water begins to take the easy way out around the edge. A rinse after each use does most of the work of keeping it open.
Where steel changes the list and where it does not
A stainless pod swaps the material of the shell and often of the mesh. It keeps a silicone ring on the lid, and the product pages of the steel pods named later in this article all describe that ring. So the list is still the same four parts: one of them changed material and the one that wears first did not.
| Part | What touches the water | The sign in the cup | First thing to check |
|---|---|---|---|
| Shell | Holds the grounds while the water passes through | Rarely the cause of a thin or gritty cup | A crack or warp, looked at in daylight |
| Lid | Takes the needle and the first rush of hot water | A leak from one side, a pour that is thin and pale | Whether it closes square |
| Silicone ring | Seals the lid over the grounds | A thin cup that is fine on some mornings and flat on others | Whether it sits fully in its groove |
| Mesh | Lets the coffee through and holds the grounds back | Silt in the last mouthful, or a brew that drags | Light through the weave, after a rinse |
Take the pod apart over a plain white plate in daylight. A ring that sits proud of its groove or has gone dull and stretched, a hairline crack near the needle hole and uneven light through the mesh all show up in about a minute, and every one of those checks is free.
What “Food Grade” and “BPA-Free” on the Label Do and Don’t Cover
A label is the maker’s statement about its own material, so read it as one: it tells you what the maker claims, and nothing about how the pod behaves in your machine.

A food-contact approval belongs to a named maker
One route a food-contact plastic takes in the US is the FDA’s notification process, and the agency publishes the FDA’s inventory of effective food contact substance notifications. According to the FDA, “The database lists effective premarket notifications for food contact substances that have been demonstrated to be safe for their intended use.” Each entry names the substance, the notifier, the intended use and the conditions of use, and a notification is effective only for the manufacturer or supplier named in it.
Read that twice. “Food safe” on a pod box points back to one maker’s paperwork for one stated use. It does not carry over to another maker’s pod that looks identical, and the listing never tells you which entry, if any, it leans on.
What the label leaves out
The bullets on a listing are claims, and the cup is the check. BPA-free and food grade describe the resin; they say nothing about your machine, how hot its water runs, or what the ring does by month two. The material line usually names the shell and then goes quiet on the silicone ring on the lid, which is the part that wears first.
A pod that gives a clean, full cup after a hard rinse is doing its job whatever the bullet says. And a pod that gives a plastic edge after the tank has been rinsed deserves a closer look at its lid, whatever the bullet says too.
Reading the material line before you order
Read three things on the line: what the shell is made of, what the lid and ring are, and which needle types the pod fits. Do it first on the pod already in your cupboard, because that costs nothing. The plainest example of a stainless line is the RUOYING SUS304 single pod, one unit of SUS304 stainless listed for the Keurig 1.0 and 2.0 machines and the least expensive single pod in this set, so reading its line risks little. It names the steel and says much less about the lid, and the lid is where it falls short: it closes unevenly from one unit to the next, some by force and some not at all, and the paint on it chips with use.
The Cup Signs of a Worn Lid or Seal
This is the check the title promises. A worn lid ring changes the cup before anything else does, so it is the first thing to look at.
A thin or leaking cup points at the ring
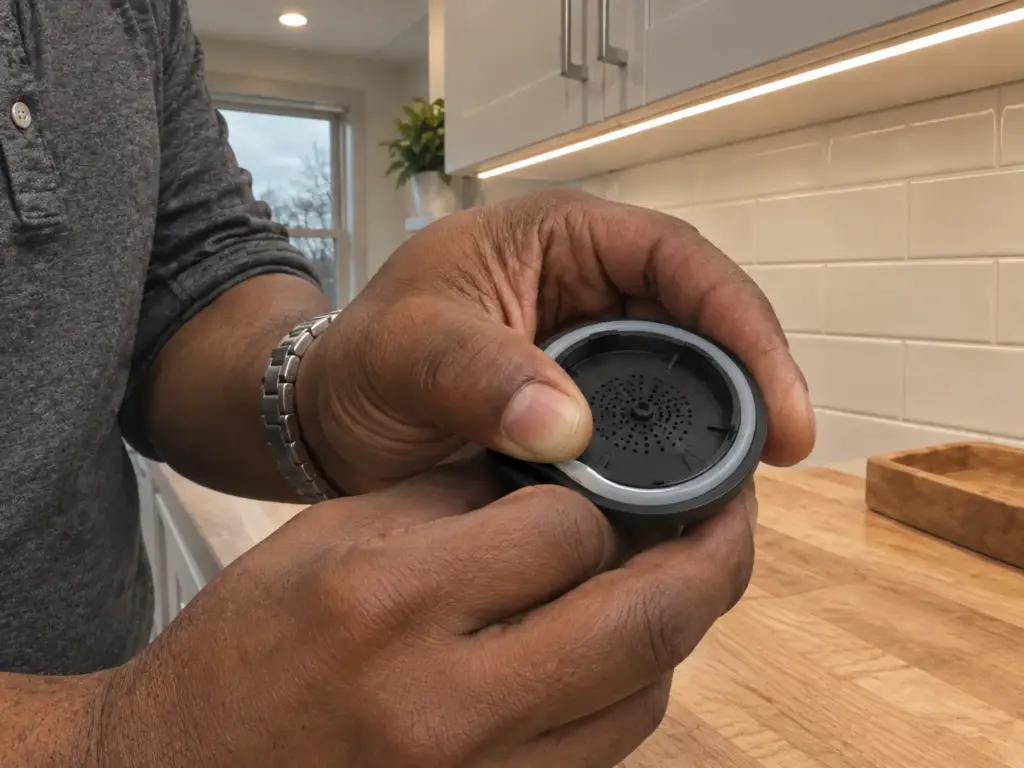
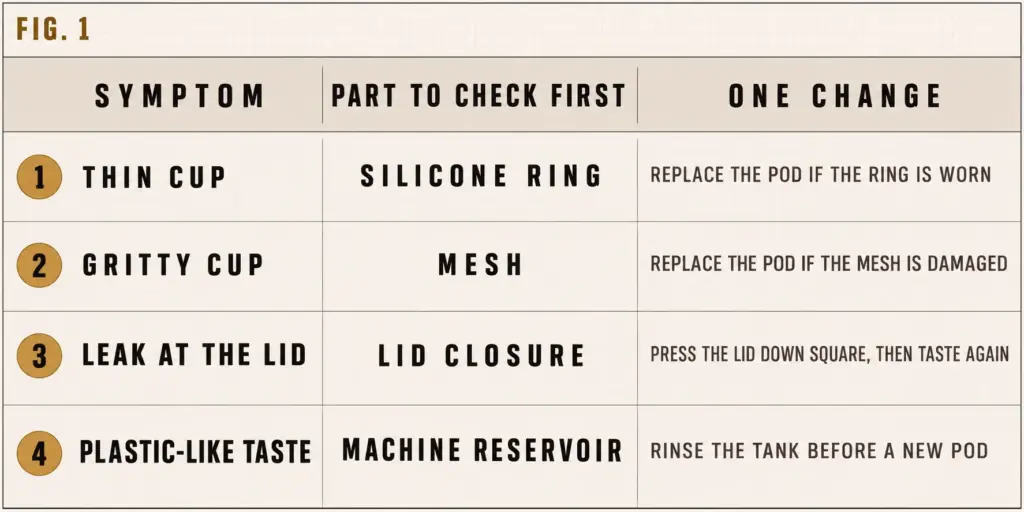
The silicone ring is the first part on these pods to come loose or soften, and once it does the lid stops sealing over the grounds. The water then takes the short route past the coffee, so the cup comes out thin, pale and watery, or it leaks from the lid line into the drip tray. It is a month-two failure and not a week-one one, because the ring wears with the washes and the heat rather than on the first morning. A cup that is flat one day and fine the next is usually this ring sitting a little differently in its groove, long before the pod’s material is the problem.
A lid that no longer closes square
A lid that does not close square leaks from one side. Close it, turn it a quarter turn and press again: if the leak moves to the other side, the lid is seating on a worn edge, and if it stays where it was, the ring is the part failing.
A lid that pops open after it has been sealed is the same fault with more force behind it. Finish on a steel lid can chip after a period of use too, and bare metal around the rim is worth noticing. The wear is not unique to this machine family: how a reusable Nespresso pod leaks by month two is the same seal-and-lid story on the capsule side, with a different lid.
Hold the test cup to the same fill, the same grounds and the same machine setting as the thin one. If the fill moves between brews, a thin cup could be your scoop and not the ring, and you will have blamed the wrong part.
What to look at first, and what to change second
The order matters, because a cup that improves after two changes cannot tell you which of them worked.
- Press the ring fully into its groove with a thumb and look for gaps, stretch or a dull, tacky surface. Close the lid square, brew the same fill and taste. A fuller cup means the ring was moving. If it is still thin, go to the next step.
- Look at the pod itself in daylight. A ring that will not stay seated, a lid that no longer closes or a visible crack means the pod is finished; replace the pod.
- Brew once more with the replacement and taste. A fuller cup with no leak closes the case. If grit has now appeared at the bottom of the mug, the trouble has moved to the mesh, which the last section covers.
Rinse the Reservoir Before You Replace the Pod
The water reaches the pod through a tank and tubing that are plastic too, so a cup with a plastic edge often belongs to the machine and not to the pod.
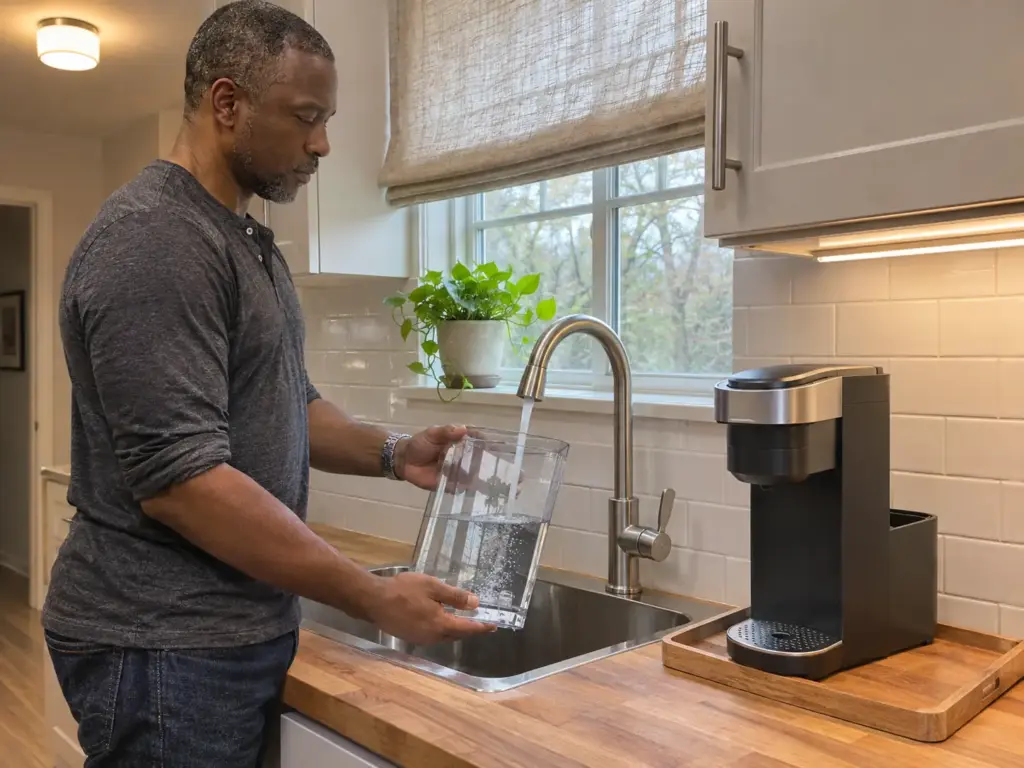
The water has already touched plastic before it reaches the pod
On most single-serve machines the reservoir and the tubing behind it are plastic, and water that sits in the tank for days takes on the taste of the tank. The pod meets the water for the length of one brew; the tank meets it for as long as it was left there. That is why changing the pod three times and tasting the same thing three times points away from the pod. What a drip machine with no plastic parts looks like applies the same water-path logic to a different machine, and it is worth a look if the tank is the part you would rather replace.
Empty the tank, rinse it, taste again
Pour out what is in the tank, rinse it with plain warm water, refill it with fresh water and run one cup through the pod you were already using. Taste it. If the plastic edge is gone, it was the tank, and no pod purchase was needed. This is the cheapest fix in the article and the one most readers skip, because the tank does not look like the suspect.
Lift the tank lid and smell the water before you brew after a few days away. A tank that smells of itself will hand that smell to the first cup, so empty it and fill it only for the next day or two of brewing.
When it is still the pod
Two outcomes are left after the rinse. If the plastic edge stays whichever pod you use, the next stop is the descaling routine and the machine’s manual, not another pod. If it stays with this pod and goes with a different one, the lid and ring from the last section are back at the top of the list.
A taste that follows the pod is a part problem. A taste that follows the machine is a water-path problem, and a new pod will not move it.
Steel Fixes the Material, Not the Seal
Stainless fixes the material and leaves the ring and the fit exactly as they were. This section covers what that buys, what it doesn’t, and which machine each pod is for.

Check the needle of your machine first
The needle count decides which reusable pod fits, and that is a check on the machine before it is a check on the pod. Many Keurig machines pierce the lid with a single needle (a 1-hole pod), while the MultiStream machines use five (a 5-hole pod), and a pod made for one is a different pod from the other. Which reusable pods fit a Keurig, by needle type lays out the fit line by line, and which Keurig line takes which pod is the way to find your machine’s needle if you do not know it.
The listing for the Noalto stainless 2-pack says outright that it excludes 3- and 5-needle brewers, which makes it a good listing to read against your machine. Its flaw sits right next to its steel: the ring on the lid can come off, the lid can pop open after it has been sealed, and the fit changes from machine to machine. A steel pod that seats a hair high in the holder, so the lid will not close on it, is usually made for another needle.
What a steel pod changes, and the ring it keeps
Steel swaps the shell, and often the mesh, for metal that does not crack, warp or stain the way a plastic lid can. That is a real gain. It also keeps the silicone ring, so the signs from earlier (the thin cup, the leak from one side, the lid that pops open) apply to a steel pod from month two on exactly as they do to a plastic one.
Some steel lids sit loose or open after sealing. The free fixes still come first: the pod you own and the tank, before any order.
The 2-pack and the 4-pack, and who each is for
A set of two or four is how these pods are normally sold, so the count is not the recommendation; the pod is. The CAPMESSO 4-pack is 304 stainless with a silicone ring and a 5-hole lid, listed for MultiStream machines only (the K-Supreme, K-Supreme Plus, K-Slim, K-Duo Gen 2 and K-Brew Chill) and useless on a 1-hole machine. Some units leak, with water running out in every direction, and that is a lid-and-ring fault to treat with the same order of checks as above. For a 1-hole machine the 2-pack is the right count, and the 4-pack is a mistake whatever its steel.
Grounds in the Cup Come From the Mesh
The mesh decides what reaches the cup, and a fine one costs something on both sides: cleaner coffee, and a screen that clogs.

A gritty cup is the mesh letting fines through
Fines that pass the mesh end up in the cup as grit. A finer screen catches more of them, but a grind that is too fine for any screen will still send dust through, which is why what grind size a K-Cup pod wants matters as much as the pod. Check the silt where it shows. A pale ring of fines at the bottom of a clear glass mug is easy to see, and a dark mug hides it completely.
Brew your test cups into a clear glass. Silt and a pale, thin pour are obvious in glass and invisible in a dark mug, and the test only counts if you can see it.
A thin cup is the grind or the fill, not the pod
With a sound pod, a thin cup is usually too little coffee for the water, or a grind too coarse for the screen. Fill level is where this goes wrong most often, and how to fill a reusable pod by the line settles it. Fix the fill before you blame the lid, and brew the same amount in every test cup.
The dual-mesh pod, and its one catch
The CAPMESSO dual-mesh 2-pack is 304 stainless for 1-hole Keurig machines (the K-Express, K-Elite, K-Mini, K-Classic, K-Compact and the first-generation K-Duo among them), and its second screen is why it throws very little sediment into the cup. The cost belongs to any fine mesh: it clogs, so it needs a rinse after each use, and the ring on its lid still wears like any other. That is the good side and the cost of the same design choice.
Press the Ring Tomorrow, Then Taste
The order for a cup that has gone wrong: look at the lid and the ring first, press the lid down square and taste. Then rinse the tank. Only after both, change the pod, and check the machine’s needle count before ordering any steel pod.
Tomorrow morning, press the ring into its groove and brew your usual fill. If the cup comes out fuller and the lid stays dry, that was the part. If it is still thin, empty and rinse the tank before you reach for a new pod.
The parts to look at again are the ring and the mesh, every few months of daily use, or whenever a cup first comes out thinner than the last. With that done, how a drip machine and a pod machine split the dose is where the machine itself becomes the question.
Frequently Asked Questions
01Are there reusable Keurig pods that are not plastic?
Yes, stainless steel reusable pods exist for most Keurig lines, though the lid still carries a silicone ring that wears. Check your machine’s needle count before ordering one.
02Why does my coffee taste like plastic from a reusable pod?
Often it is the machine’s tank and tubing that give the taste, not the pod. Rinse the reservoir, refill with fresh water, brew once and taste again before replacing the pod.
03How do I know if the lid ring on my pod is worn?
A cup that comes out thin, a lid that pops open or leaks on one side, or a ring that sits loose in its groove all point to a worn ring. Replace the pod or the ring.
04Does a reusable steel pod fit every Keurig?
No. A pod made for a single needle does not fit a 5-hole MultiStream machine, and the reverse is also true. The listing says which machines it excludes.
05Why are there grounds in my cup with a reusable pod?
The fines are passing through the mesh. A finer screen catches more of them, but the grind and the fill line decide how much reaches it.



How did your cup turn out?
No comments yet. Tell us what you changed — and whether the needle moved.